Create and set up screens
Screens are the pages of your app: a home page, a settings page, a profile page. Add one from a template in a few clicks, then set up its frame, its address in your app, and whether your app opens on it.
Add a screen
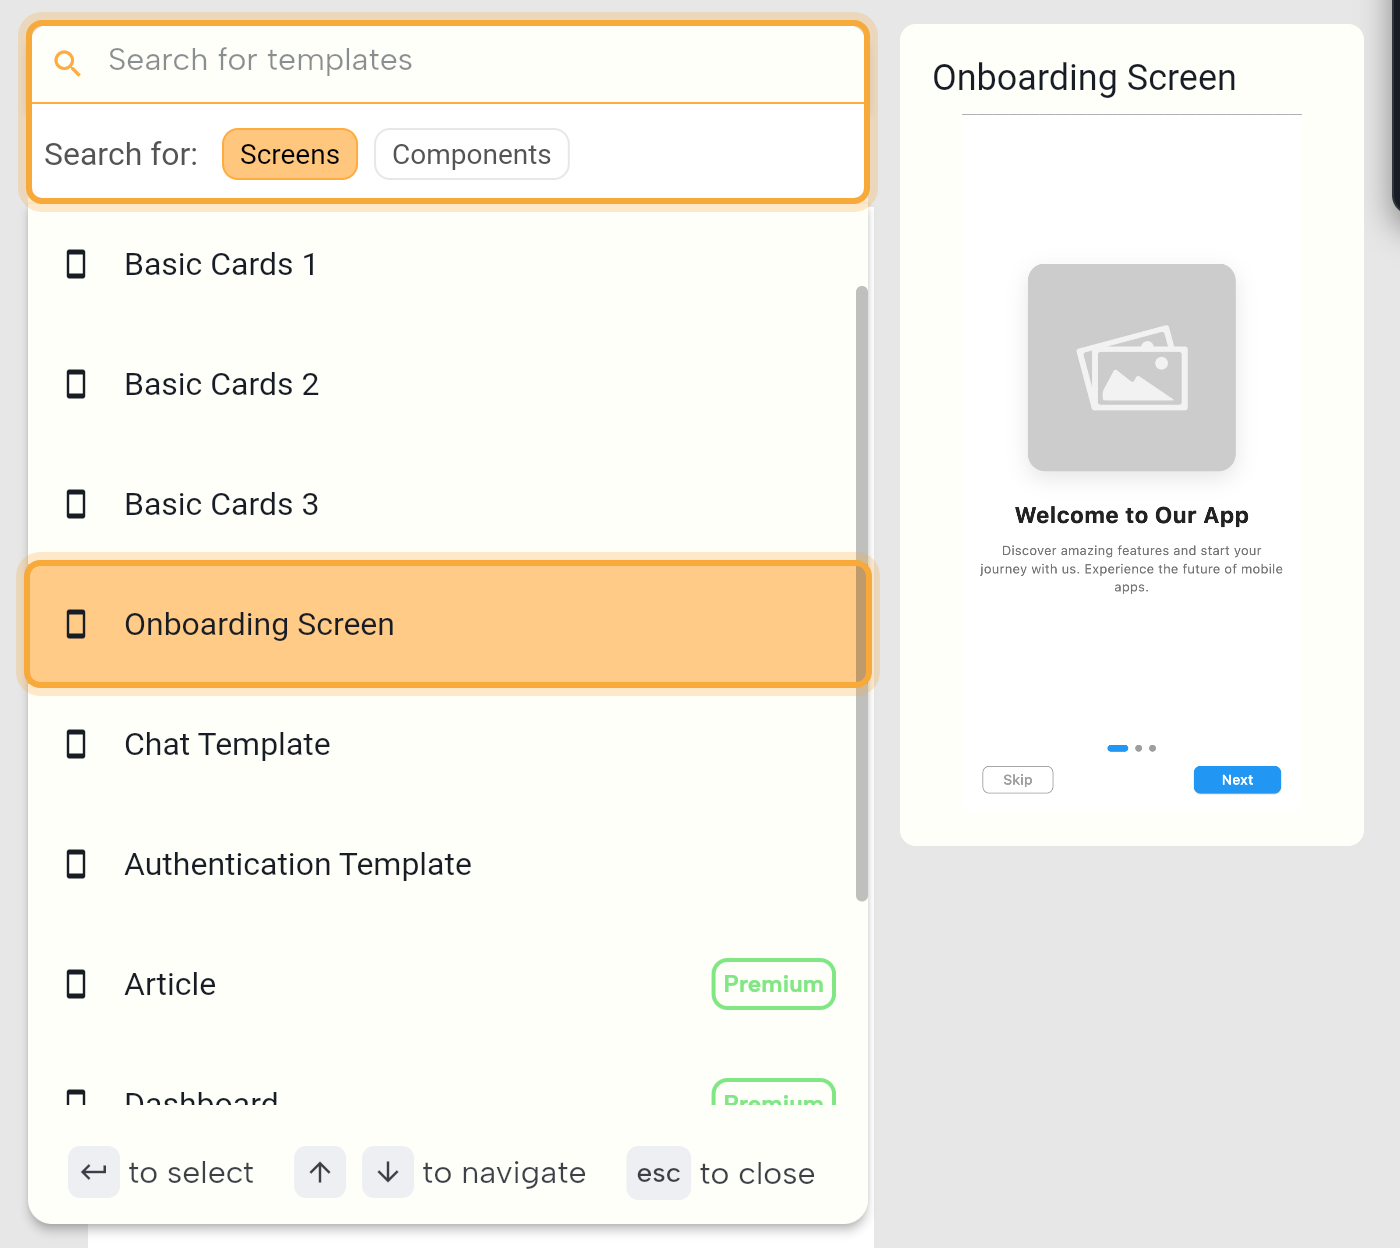
- Click Screen in the toolbar at the bottom of the board, or right-click empty board space and choose Create a page. The template picker opens.
- Next to Search for:, keep Screens selected. The other choice, Components, lists templates for components. Type in Search for templates or scroll, and highlight a template to preview it on the right.
- Click a template. Empty Page gives you a blank screen to fill yourself.
- Type a name, such as
SettingsPage, and click Submit. The dialog is titled after the template, such as New Empty Page. Its Class name and Path lines show how the screen is named and stored in your project's code, and you can leave them as they are. - The screen appears on the board, ready to fill. In projects that use GoRouter, the navigation system new projects start with, Nowa also gives it a route, its address in your app (see Name the route).
A new screen is 393 × 808 (the Pixel 3a size) unless the template sets its own. It doesn't become your home screen by itself: see Choose the home screen.
Some templates add several files. The dialog is then titled Add plus the template name and lists the files. Review them and click Import. Nowa asks before it overwrites a file with the same name, so nothing is replaced by surprise.
Templates marked Premium need a plan that includes premium templates. If yours doesn't, Nowa shows an upgrade dialog. See pricing. Browse what's available in Start from a template.
Try "Create a login screen with email and password fields and a Sign in button." When Nowa AI creates a screen, it places it on your open board, so you can check it and adjust it right away.
Set up a screen
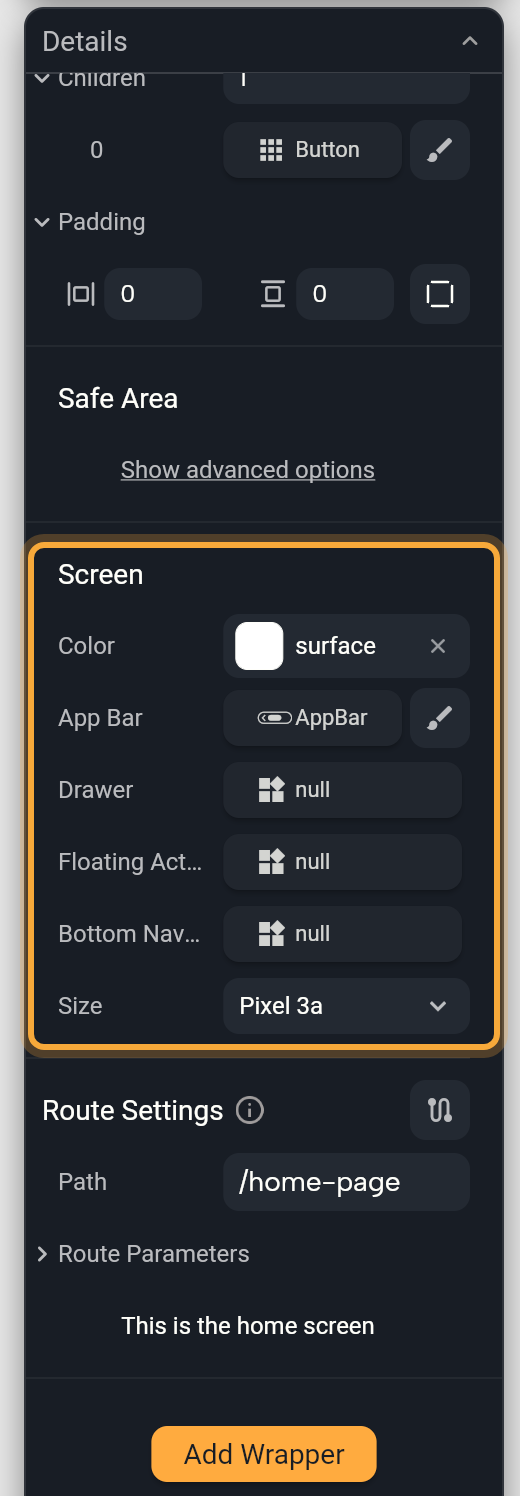
Click the screen's title to select it. In Details, the Screen section holds the screen's frame: the parts around your content.
| Setting | What it does |
|---|---|
| Color | The background color. It starts as your theme's surface color. |
| App Bar | The bar at the top, for the screen's title and buttons. Click the slot, pick a widget, then edit its title and colors. |
| Drawer | A side menu that slides in. |
| Floating Action Button | A round button that floats over the content, such as + to add a new item. |
| Bottom Navigation Bar | A bar at the bottom for switching between the main parts of your app. |
| Size | Resizes the screen on the board. Presets: Pixel 3a, iPhone 11 Pro, Galaxy S20+, iPhone 12, MacBook Pro and 1920x1080. |
Fill the other slots the same way: click the slot, which reads null (empty) until you fill it, and pick a widget. Dragging one of these widgets onto the screen fills its slot only where none of the screen's groups is under the pointer. Over the Stack that fills the body of an Empty Page screen, it lands in the Stack instead, so use the slot in Details for those.
Size only changes how big the screen looks on the board. Your app fills the real device, whatever its size. See Design for every screen size.
Your content usually lives in the screen's main group, which you set up in the Group section of Details. A screen made from Empty Page starts as a Stack, where you place widgets freely. Switch it to a Column when you want them to line up and make room for each other: see Lay out widgets. Other sections, such as Safe Area (which keeps your content clear of notches and system bars), come from wrappers: see Add a wrapper and the list of wrappers.
A widget counts as a screen when it has the Screen wrapper. Without it, it's a component.
Name the route
A route is a screen's address in your app, such as /settings. Other screens use it to open this one, and on the web it becomes part of the page's link. Route Settings, in the Screen section, sets it. It appears in projects that use GoRouter, which all new projects do. For an older project, see Switch an older project to GoRouter.
- Click the route icon next to Route Settings (Open Router Editor). In the Router panel, select the screen's route, type a path such as
/settingsin Path and press Enter. Don't type it in the Path field of Route Settings: in Nowa 3.13 that field drops every/you type. - To pass data in the address, such as which recipe to show, expand Route Parameters and click + (Add Route Parameter).
- Type a Param name and link it to one of the screen's params (the values the screen receives) with the link button. See Pass data with parameters.
A screen without a route shows the default path as the hint in Path: its name in lowercase words joined by hyphens, for example /home-page. To add its route, see Set up routes in the Router panel.
Choose the home screen
The home screen is the one people see first when they open your app.
- Select the screen.
- Click Make home screen, at the bottom of the Screen section.
The current home screen shows This is the home screen instead of the button. Its title on the board and its row in the Outline show a home icon, so you can spot it at a glance.
Rename, describe, copy and open
- Rename. Double-click the title on the board, type the new name and press Enter. Or click the pencil (Rename) next to the name in Details. Nowa updates every place that uses the screen for you.
- Add description. Click Add description under the name in Details, write a short note about what the screen is for, then click the back arrow (Back to fields). It's a handy note for your teammates and for Nowa AI. It shows in the details card of the Library and in the widget picker dialog when you pick the screen.
- Copy as new widget. Right-click the screen's title and choose Copy as new widget, name it and click Submit. You get a separate screen, placed on the board, that you can change without touching the original.
- Open in new tab. Hover the title and click Open in new tab, or select the screen and press Ctrl/Cmd + I. The screen opens on its own, with the Outline floating at the top left, which helps when you want to focus on one screen. To go back, click Back in the top bar, or open the Boards chip and pick the board.
One screen, many places
The same screen can sit on several boards, or twice on one board, for example to compare two sizes. Every one of those board items shows the same screen, so a change in one shows in all of them. Copy and paste works the same way: it adds another board item for the same screen, not a new screen.
When you want a separate screen, use Copy as new widget. Detach shows on a screen's right-click menu too, but it swaps that board item for a loose copy that isn't part of your app. The screen itself stays in your project, and Ctrl/Cmd + Z undoes the swap.
Delete a screen
To take a screen off the board, click its title, then right-click the title and choose Remove, or press Delete (Backspace on macOS). The screen stays in your project, so you can drag it back from the Library any time.
To delete the screen itself, open the Library, find the screen under Project, right-click it and choose Delete, then click Yes. If other places use it, Nowa lists them and asks you to confirm again. See Build reusable components.
Next steps
- Add widgets: fill the screen from the Library.
- Navigation bars and screen parts: set up the app bar, drawer, floating button and bottom navigation bar.
- Build reusable components: turn part of a screen into a widget you can reuse.
- Navigate between screens: open one screen from another.