Send push notifications
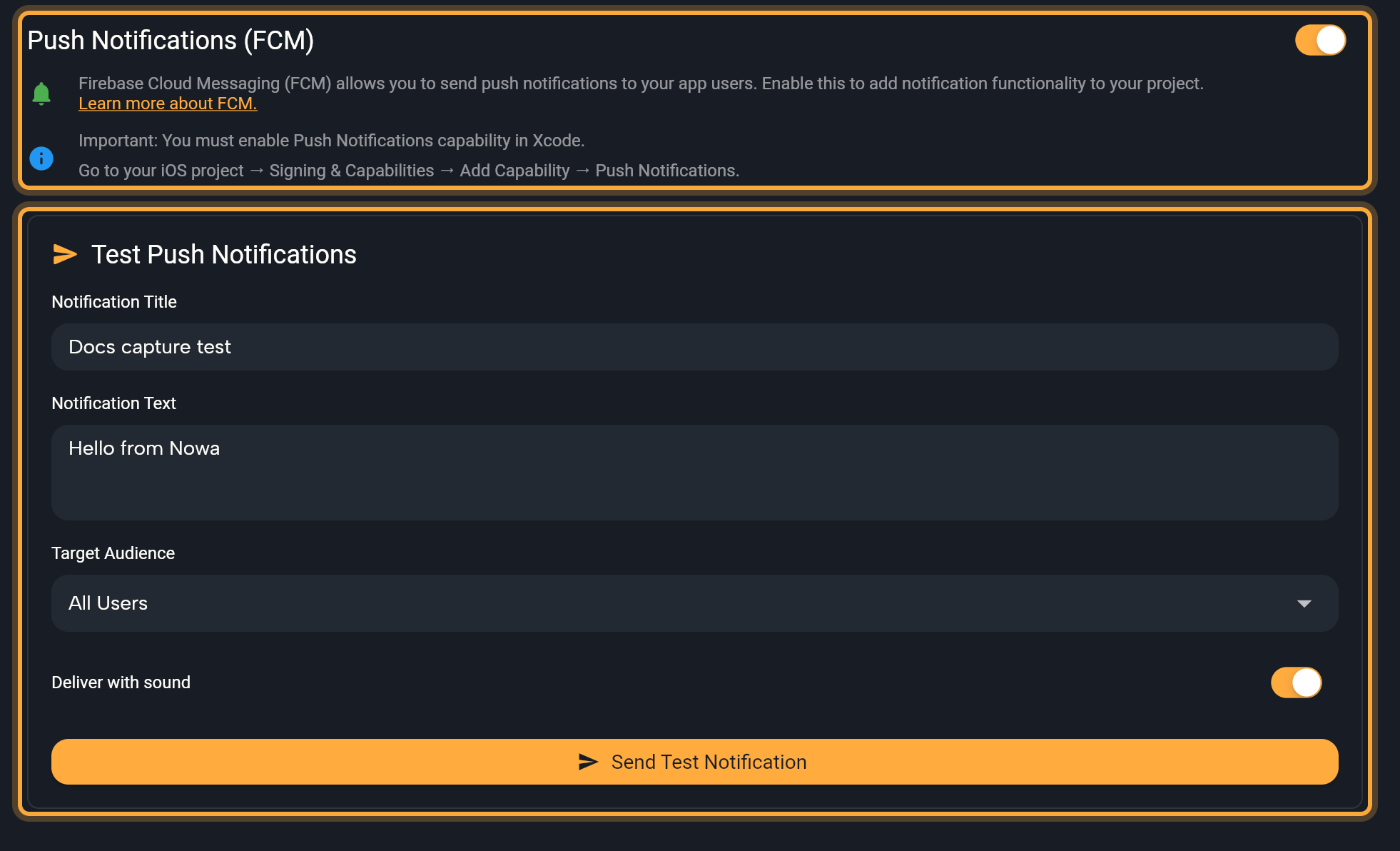
Push notifications reach people even when your app is closed: an order update, a reminder, a message from a friend. Turn on Push Notifications (FCM) and Nowa adds notifications to your app. FCM stands for Firebase Cloud Messaging, the Firebase service that delivers them. Then send yourself a test notification from the same page and watch it arrive.
Before you start
- A project connected to Firebase. See Connect Firebase.
- A device or emulator to run your app on. See Run on a device or emulator.
- For iPhones and iPads: an Apple Developer account with the Account Holder or Admin role, to create the push key described below.
Turn on push notifications
- Open Settings → Integrations → Firebase and turn on Push Notifications (FCM).
- The first time, Nowa opens Add Missing Dependencies: "Package flutter_local_notifications requires the following dependencies", with the Android permission
RECEIVE_BOOT_COMPLETEDin the list (it lets your app know when the phone has restarted). Click Add. The Test Push Notifications box appears below the switch. - For iPhones and iPads, do the Apple setup in Set up notifications for iPhone.
- Run or publish your app again, so the new version includes notifications. See Publish to Google Play and Publish to the App Store.
What your app does with notifications
Once your app has notifications, it asks people for permission to show them when it starts, and it signs the device up for the topic all. A topic is a group of devices you can message at once, so a notification sent to all reaches everyone who uses your app. Notifications also show up while the app is open, and messages that arrive while it's in the background are handled too. Tapping a notification doesn't take people to a particular screen.
| Platform | What to know |
|---|---|
| iPhone and iPad | Needs the Apple setup below. Nowa adds the background settings iOS needs to receive notifications the next time it rebuilds your app's iOS settings file, for example when you change an iOS permission. So before your first iPhone build, turn on an iOS permission your app doesn't use and turn it off again in Permissions, or ask Nowa AI in Agent mode to check that these settings are there. |
| Android | Nowa turns on an Android build setting that the notification tools need. |
| Web | Nowa doesn't set up push notifications for the web version of your app. |
Working in the code? See What Nowa adds to your code.
Set up notifications for iPhone
Apple delivers every notification to iPhones and iPads itself, through its Apple Push Notification service (APNs). So Firebase needs a key from your Apple account to hand notifications over to Apple, and your app has to tell Apple that it uses notifications. You do this once per app.
Allow notifications for your app's ID. In your Apple Developer account, open Certificates, Identifiers & Profiles:
- Click Identifiers, select your app's identifier (the one that matches your Bundle Identifier) and click Edit.
- Tick Push Notifications and click Save. If a warning appears, click Confirm.
If your app's identifier isn't registered yet, register it as Register your bundle ID shows, and tick Push Notifications there.
Create a push key.
- Click Keys, then the add button (+).
- Under Key Name, type a name you'll recognize, such as "My app push".
- Tick Apple Push Notification service, click Configure next to it, and choose the environment and the type of key. A key for both the sandbox (test) and production environments works for every kind of build, and Team Scoped works for all your apps. Then continue.
- Review the key and click Confirm.
- Click Download to save the key file (its name ends in
.p8), then click Done. Keep the file somewhere safe: Apple lets you download it only once. - Note two codes: the Key ID, which appears under the key's name when you select it in Keys, and your Team ID, which you see when you click Membership details in your developer account.
Add the key to Firebase.
- In the Firebase console, open your project's settings (the gear icon) and click the Cloud Messaging tab.
- Under iOS app configuration, find APNs authentication key and click Upload. Firebase has one slot for a development key and one for production, and needs at least one. If your key covers both environments, you can upload it to both.
- Choose your
.p8file, enter the Key ID and your Team ID, and click Save.
Add the Push Notifications capability to your app. Your app itself also has to say that it uses notifications. Nowa reminds you of this under the switch: in Xcode, go to your iOS project → Signing & Capabilities → Add Capability → Push Notifications. Xcode is Apple's app for building iPhone apps, and it runs only on a Mac.
- In the macOS desktop app, the Open Xcode Workspace link under the switch opens your project in Xcode. It works for local projects, whose files are on your Mac.
- If you don't use Xcode, ask Nowa AI in Agent mode, for example: "Add the Push Notifications capability to my iOS app, the way Xcode's Signing & Capabilities does." Nowa can't check this part for you, so after your next iOS build, send a test notification to an iPhone to confirm it works. If something breaks, Restore Checkpoint undoes the AI's changes.
If your app also takes Apple Pay through Stripe, add the capability again after each Deploy Configuration there: in Nowa 3.13, deploying rewrites the file that holds your app's capabilities and leaves push notifications out.
The official guides have more detail: Firebase's Upload your APNs authentication key, and Apple's Create a private key and Enable app capabilities.
Send a test notification
Use the test box to check that everything works before your users rely on it.
- Under Test Push Notifications, type a Notification Title and Notification Text, such as "Your order is on its way".
- Choose a Target Audience.
- Leave Deliver with sound on to play the default sound, or turn it off.
- Click Send Test Notification. After a successful send, the title and text fields clear. Devices that run the new version of your app, and allowed notifications, receive it.
| Target Audience | Who gets it |
|---|---|
| All Users | Every device subscribed to the topic all. Your app subscribes each device when it starts. |
| Topic | Devices subscribed to the topic you type in Topic name. It starts as all. |
Nothing is sent when the title or the text is empty. Only the topic all is set up for you, so a test sent to another topic reaches only devices that your app has subscribed to that topic in some other way, for example with logic you or Nowa AI added.
Nowa sends the test with your Google sign-in. If sending fails, a red message shows one of these:
- "Permission denied. Check Firebase project permissions."
- "Project not found. Check Firebase project ID."
- "Network error occurred. Please check your connection."
- "Unknown error occurred while sending notification."
If Google no longer accepts Nowa's sign-in when you send, for example because it expired, Nowa disconnects Firebase from your project and the page returns to Connect Firebase. Only your Firestore collections and queries stay. Connect again, then turn Authentication and Push Notifications (FCM) back on.
Google's sign-in expires after about an hour. To be safe, click Refresh/Update apps and config files before you send. If the page then shows Connect Firebase, click Continue with Google and sign in: that keeps your project connected.
What a notification looks like
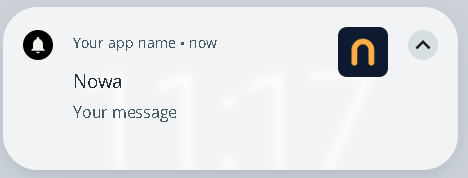
The look depends on the device. These are test notifications on iOS and Android.

Turn push notifications off
Turn off Push Notifications (FCM) to take notifications out of your app again. Nowa removes the notification code and its packages. The Android permission from step 2 stays, which is why Add Missing Dependencies only appears the first time.