Screens
On this page, we will learn how to deal with Screens in Nowa.
Create new screens
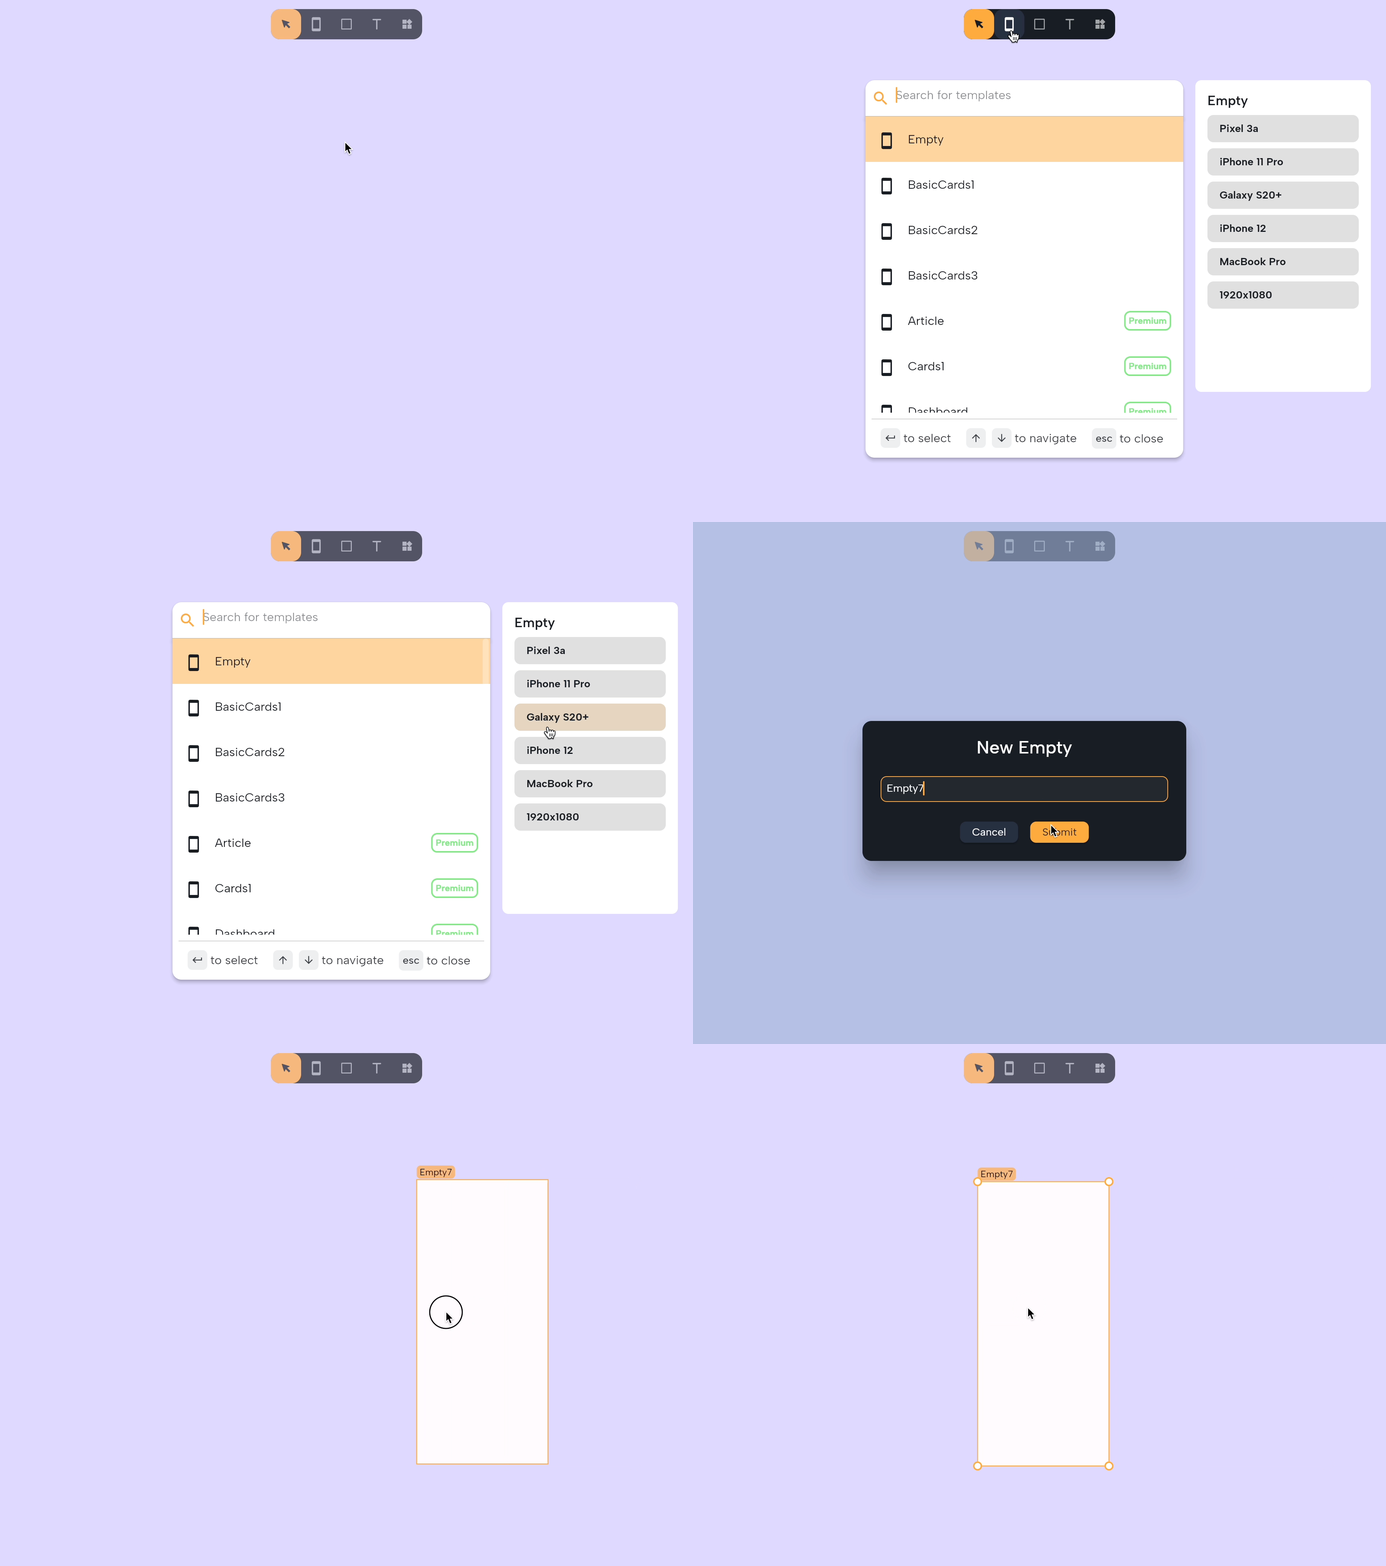
- To create a new screen on your board, select the screen tool on the Toolbar.
- Here you can select and empty screen with a default size or select one of the available templates.
- Give a name to your new screen and press "Submit".

Modify screen name
You can modify and change the name of your screens by double-clicking the name on the board or by selecting the renaming button at the top of the details panel after selecting the screen.
Adding screen from the Files library
Screens created can be found also in the Files library and can be added to the board by dragging and dropping them. This will create an instance of that screen on the board. You can also delete them from the project by right-clicking on the screen file inside the files panel and then choosing "Remove".
Screens behave as components, meaning that modifying one instance of the screen somewhere will modify all the other instances from that exact screen if exist somewhere else: if you drop the same screen file on multiple boards you aren't creating a copy out of it, you accessing the same screen file but from different places. Learn more about Components
To separate the screen instance:
- Right click on the screen on the board
- Select "Detach"

Remove screens from the designer board
Follow these steps to remove screens from the design board.
- Right click on the screen on the board
- Select "Remove"
⚠️ Removing a screen from the board won't delete them from the project, it just removes them from the board alone, they can still be accessed from the Files library. To permanently delete a screen from a project they need to be removed from the Files library.
Discover more about Screen in Screen Properties.