Screens
Screens are the main building blocks of your app.
Each screen represents a page or view — like a home page, settings page, or profile page.
This page explains how to create, rename, remove, and customize screens in Nowa.
Creating a New Screen
To create a new screen:
- Select the Screen tool from the Toolbar.
- Choose either an empty screen (with a default size) or start from one of the available templates.
- Give your screen a name.
- Click Submit.
Renaming a Screen
You can rename a screen in two ways:
- Double-click its name directly on the board.
- Or select the screen, then click the rename button at the top of the Details panel.
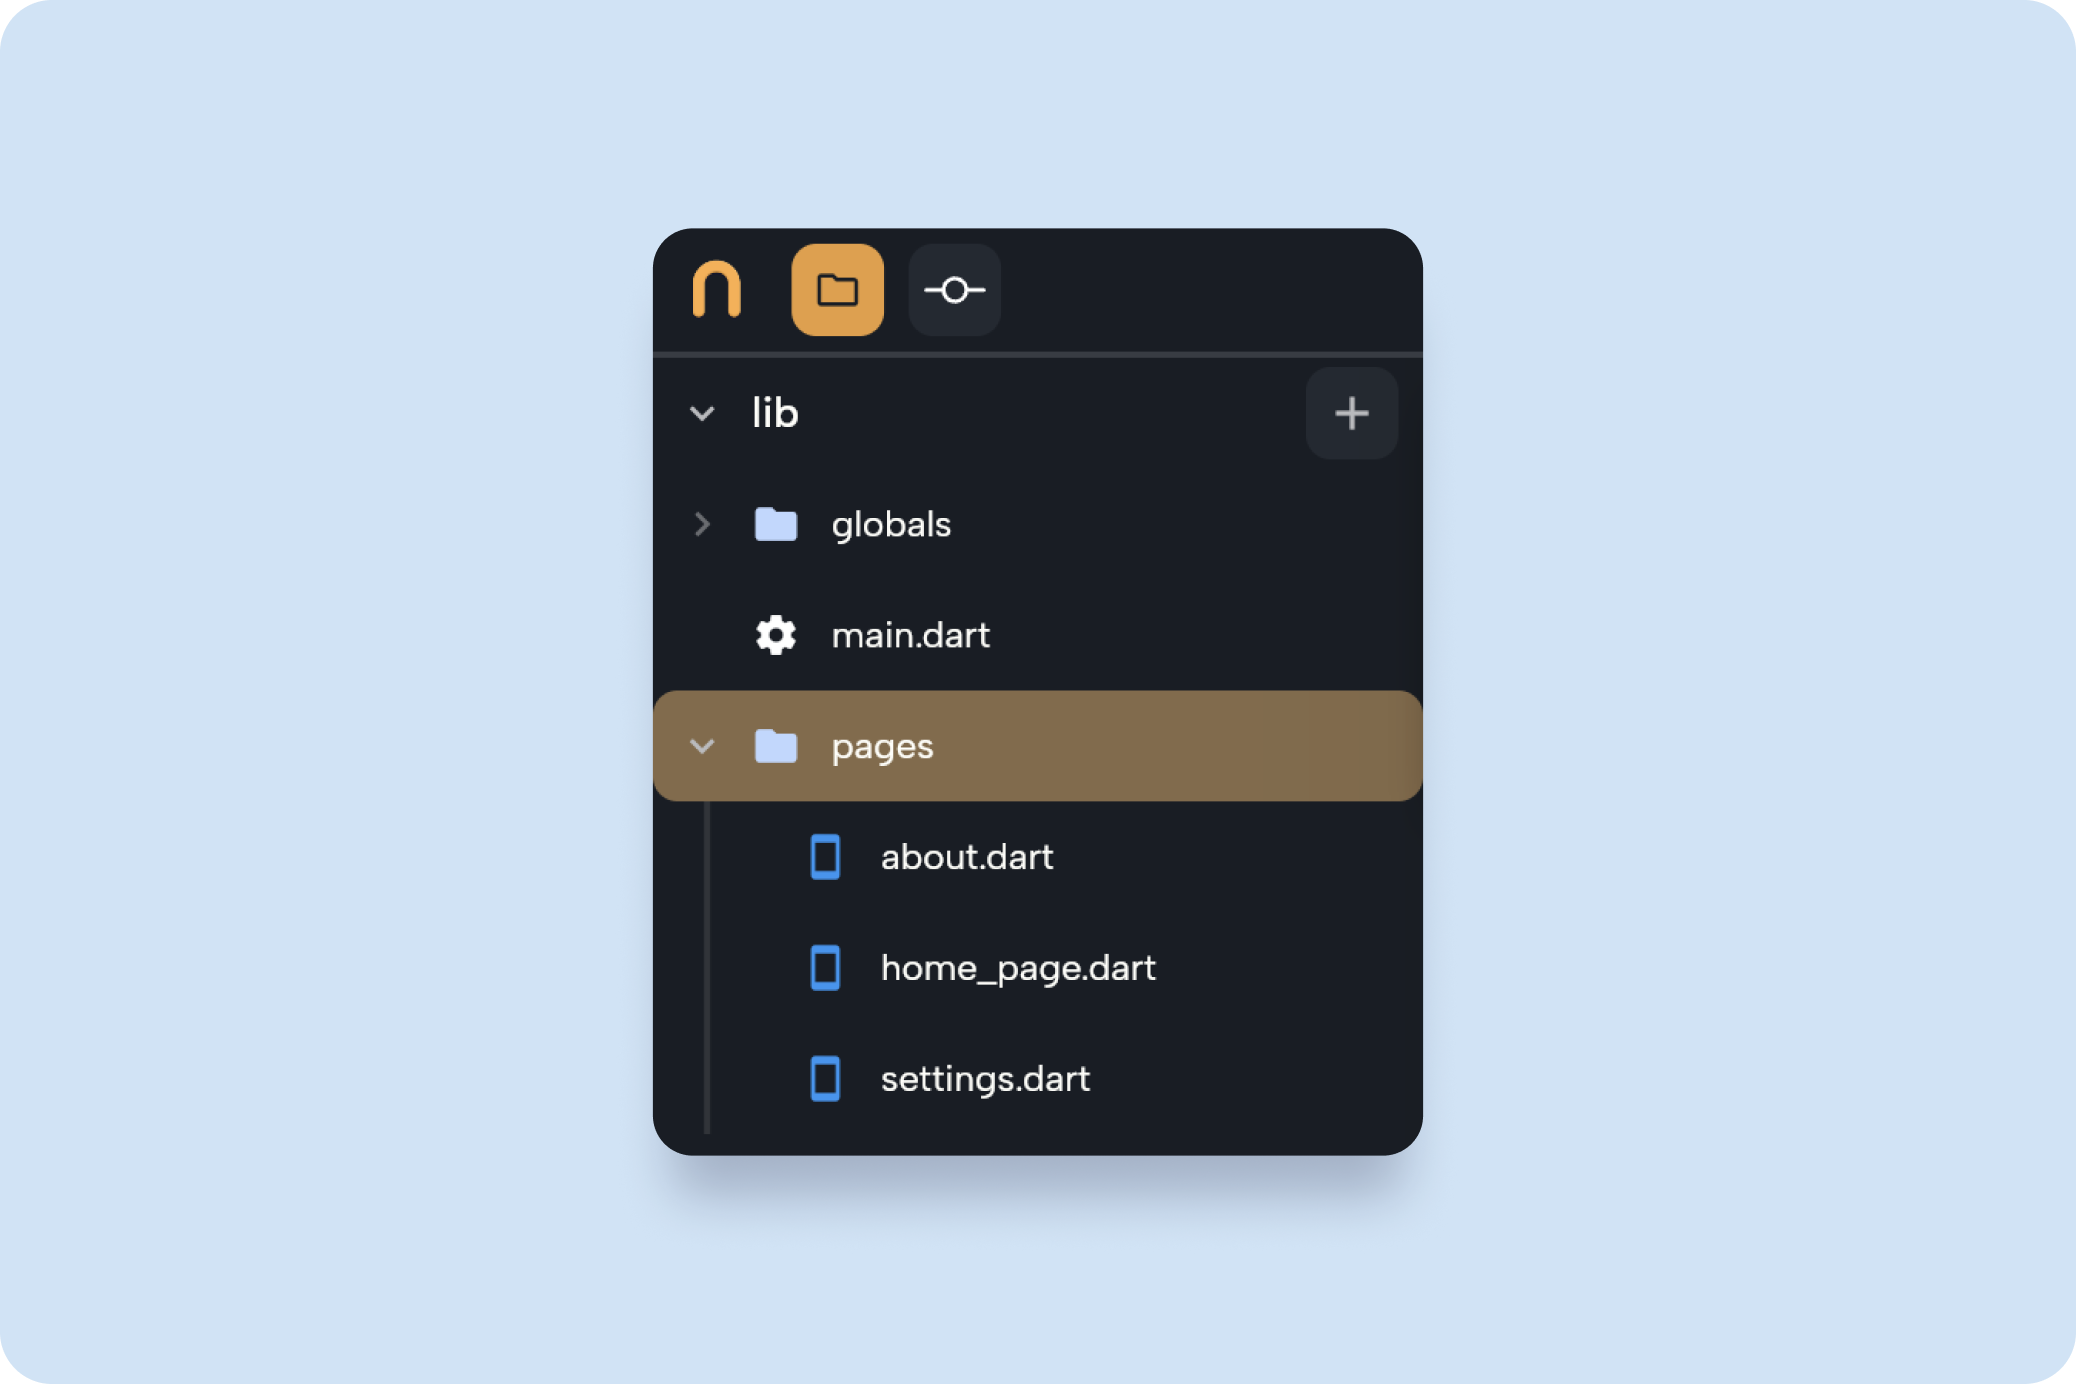
Adding Screens from the Files Panel
All screens you create are stored in the Files panel.
You can drag and drop them from there onto your board to add them.
Each screen behaves like a component — which means:
- If you edit one instance of a screen, all other instances of that same screen will update automatically.
- Dropping the same screen on multiple boards doesn’t create copies — it’s still the same screen file accessed from different places.
To separate a screen instance:
- Right-click the screen on the board.
- Select Detach.
Removing Screens from the Board
To remove a screen from the board:
- Right-click the screen on the board.
- Select Remove.
Removing a screen from the board does not delete it from your project.
It only removes it from the board view — the file will still exist in your Files panel.
To permanently delete it, remove it from the Files library.
Screen Properties
Each screen has a set of properties you can view and edit in the Details panel.
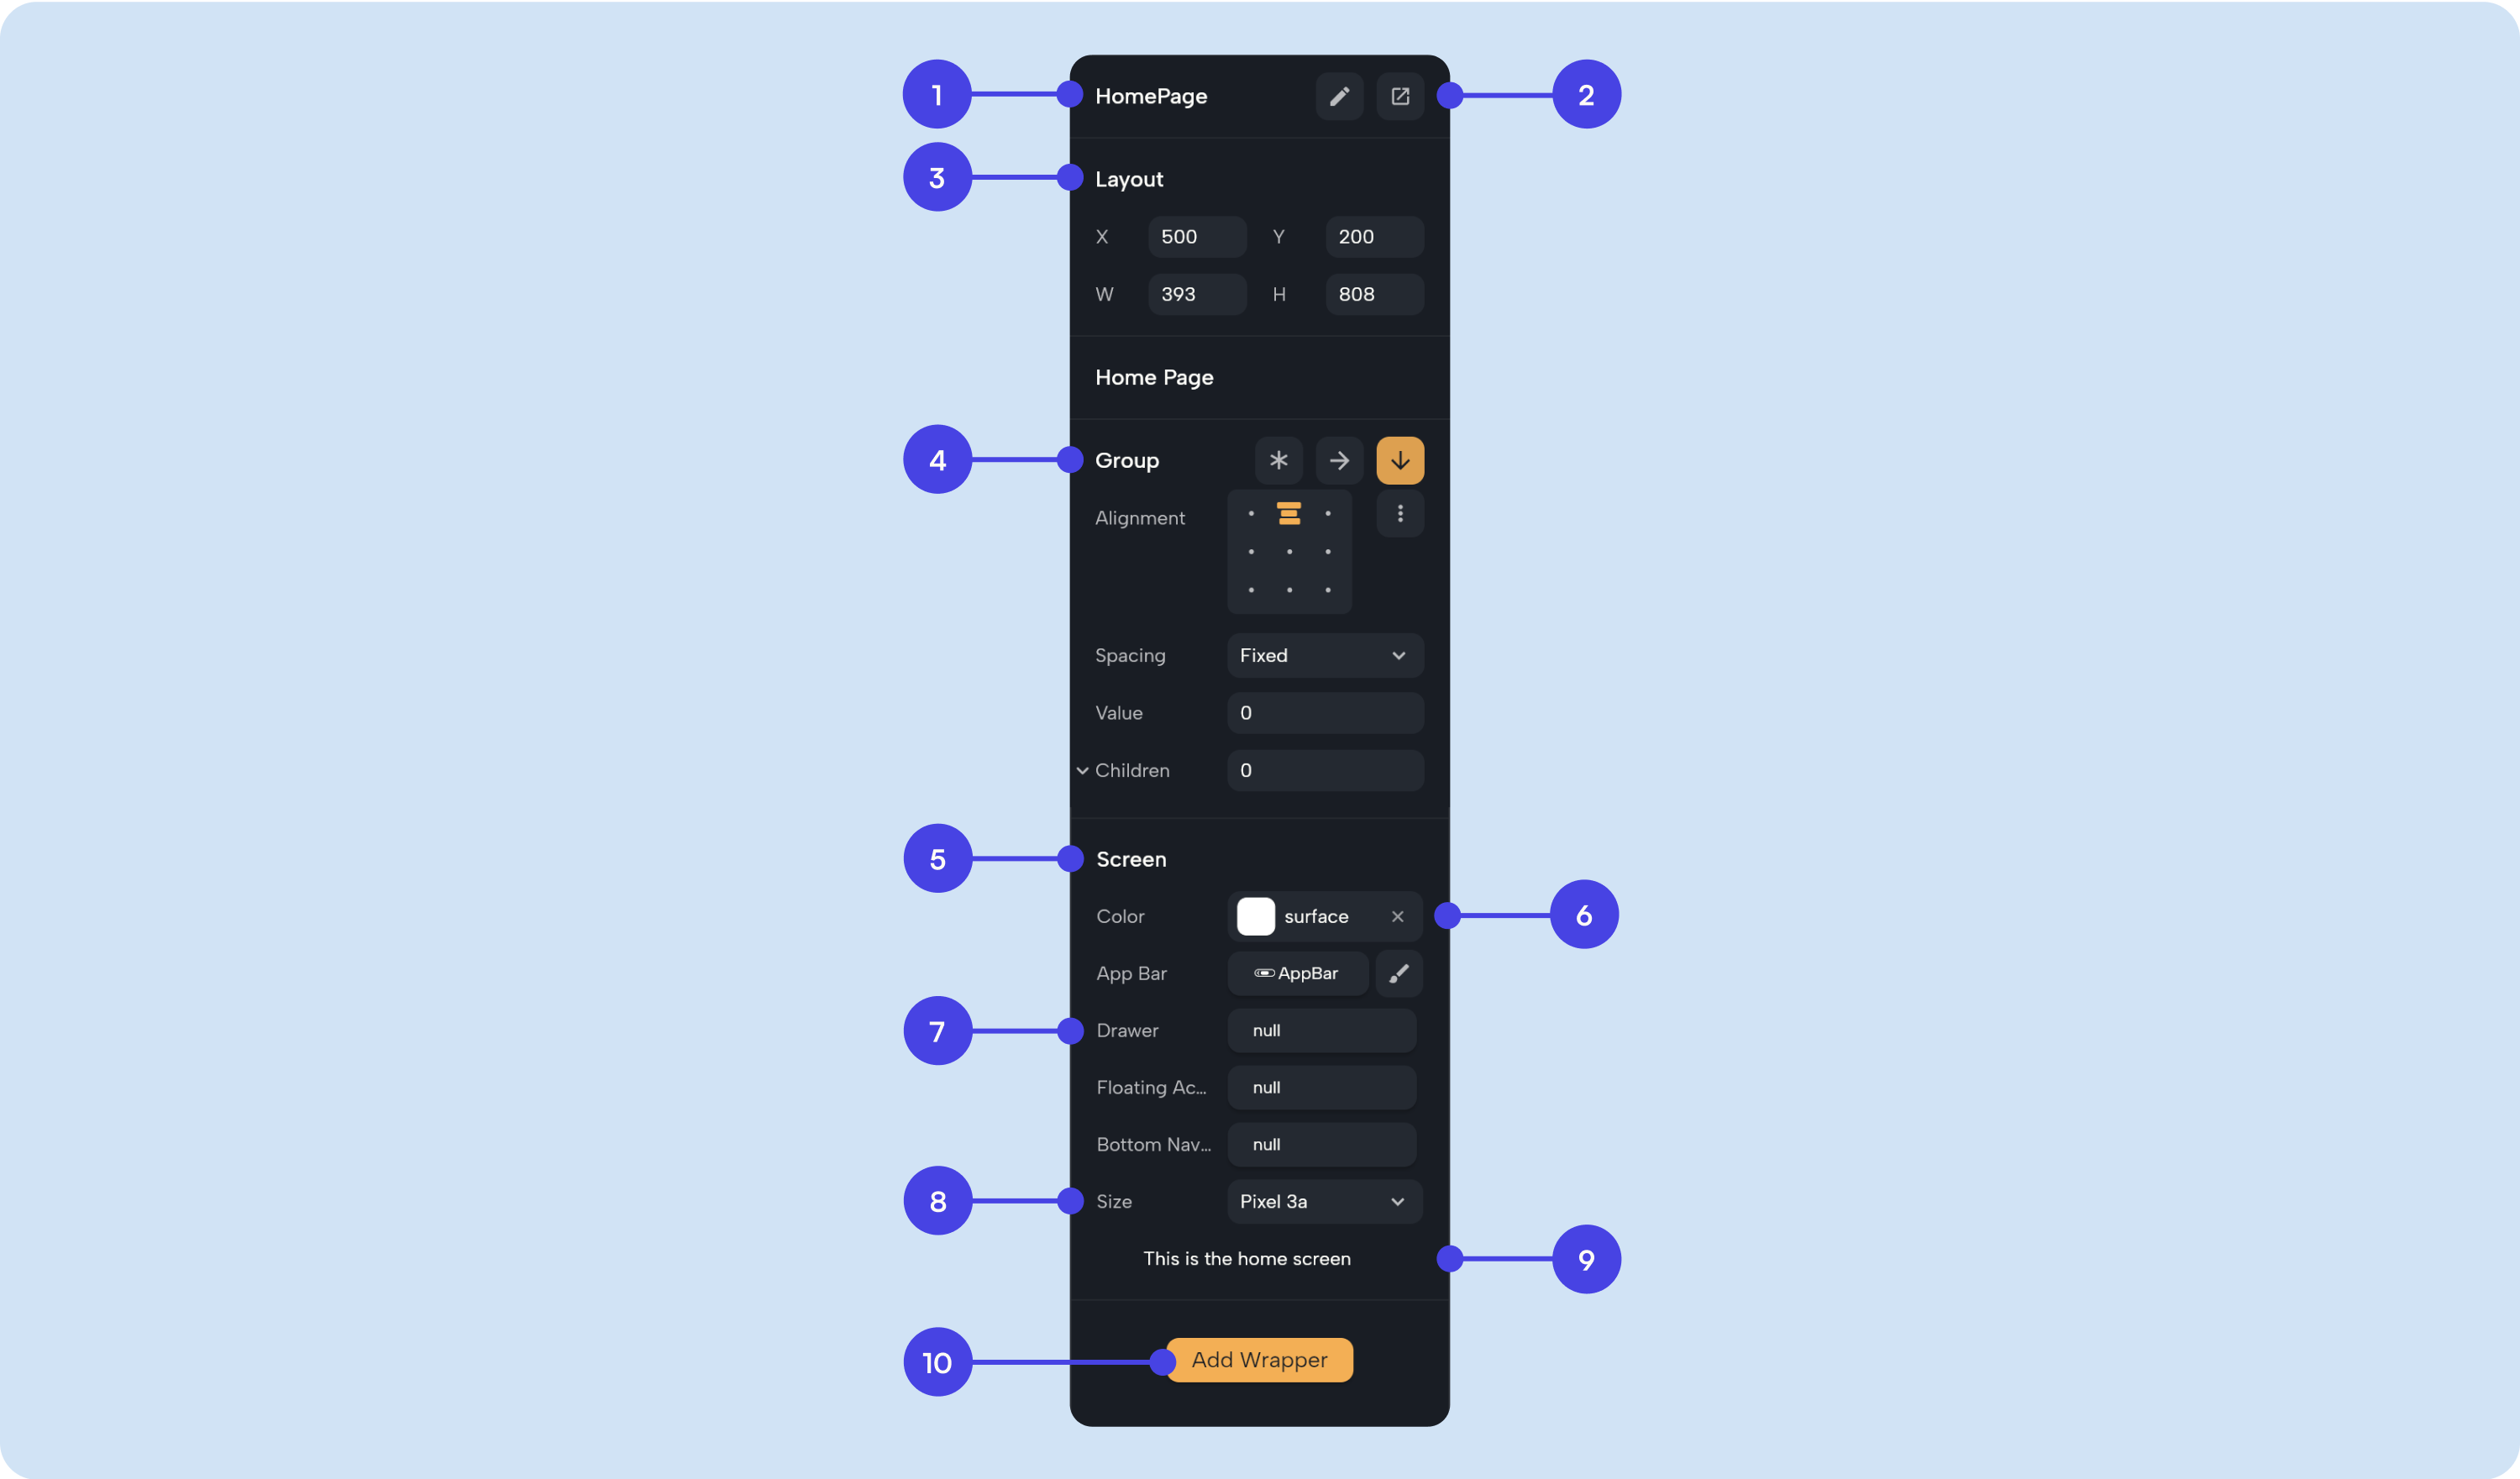
- Name — Shows the screen name. You can rename it by clicking the rename button.
- Open in a new tab — Opens the screen as a separate file tab.
- Layout — Lets you change the screen’s position and size.
- Group — Screens are set to Stack by default. You can change the layout of its widgets to a Column or Row. Learn more in Layout.
- Screen — This wrapper defines the screen. If you remove it, the selected widget will no longer be a screen.
- Color — Changes the background color of the selected screen.
- Navigation — Add navigation widgets such as
Appbar,Floating action,Drawer, orBottom navigation. - Size — Adjust the screen size or pick a preset size.
- Make Home Screen — Sets this screen as the home screen, making it the first one shown when the app runs.
- Wrappers — Add wrappers to your screen for extra layout control. Learn more in Wrappers.