Create and display Lists
In this section, you will learn:
1. Create lists of standard and custom types
2. Filling the list manually, with Circuit or with a data-source
3. Display the list in a Listview and Gridview
If you building a professional app, there's 95% chance at least that you will need to have a list that displays a group of data in a pleasant way. This guide will walk you though creating a list, filling it and then displaying it to your users.
Create a list
To create a list of a certain type, choose the "List" option when selecting the data type of the variable in the popup of creating a variable.
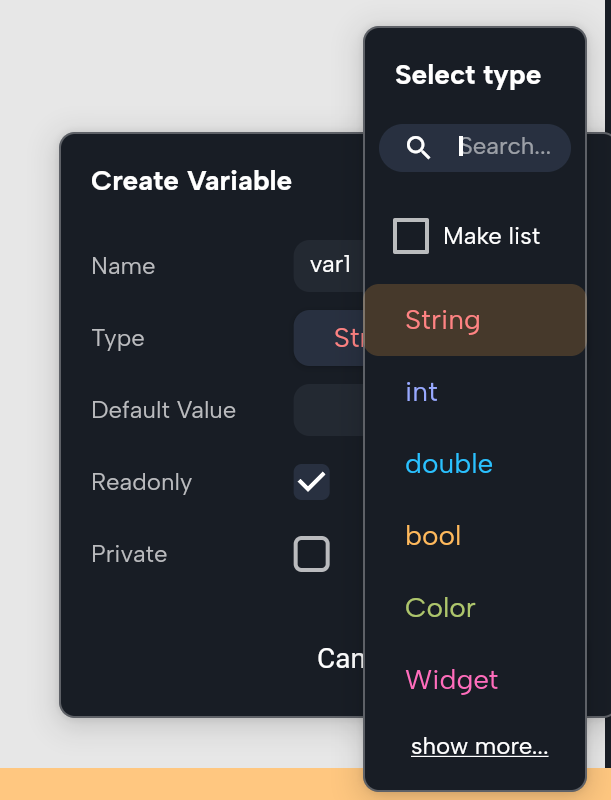
Lists of custom objects
You can create variables that are lists of custom objects you created before.
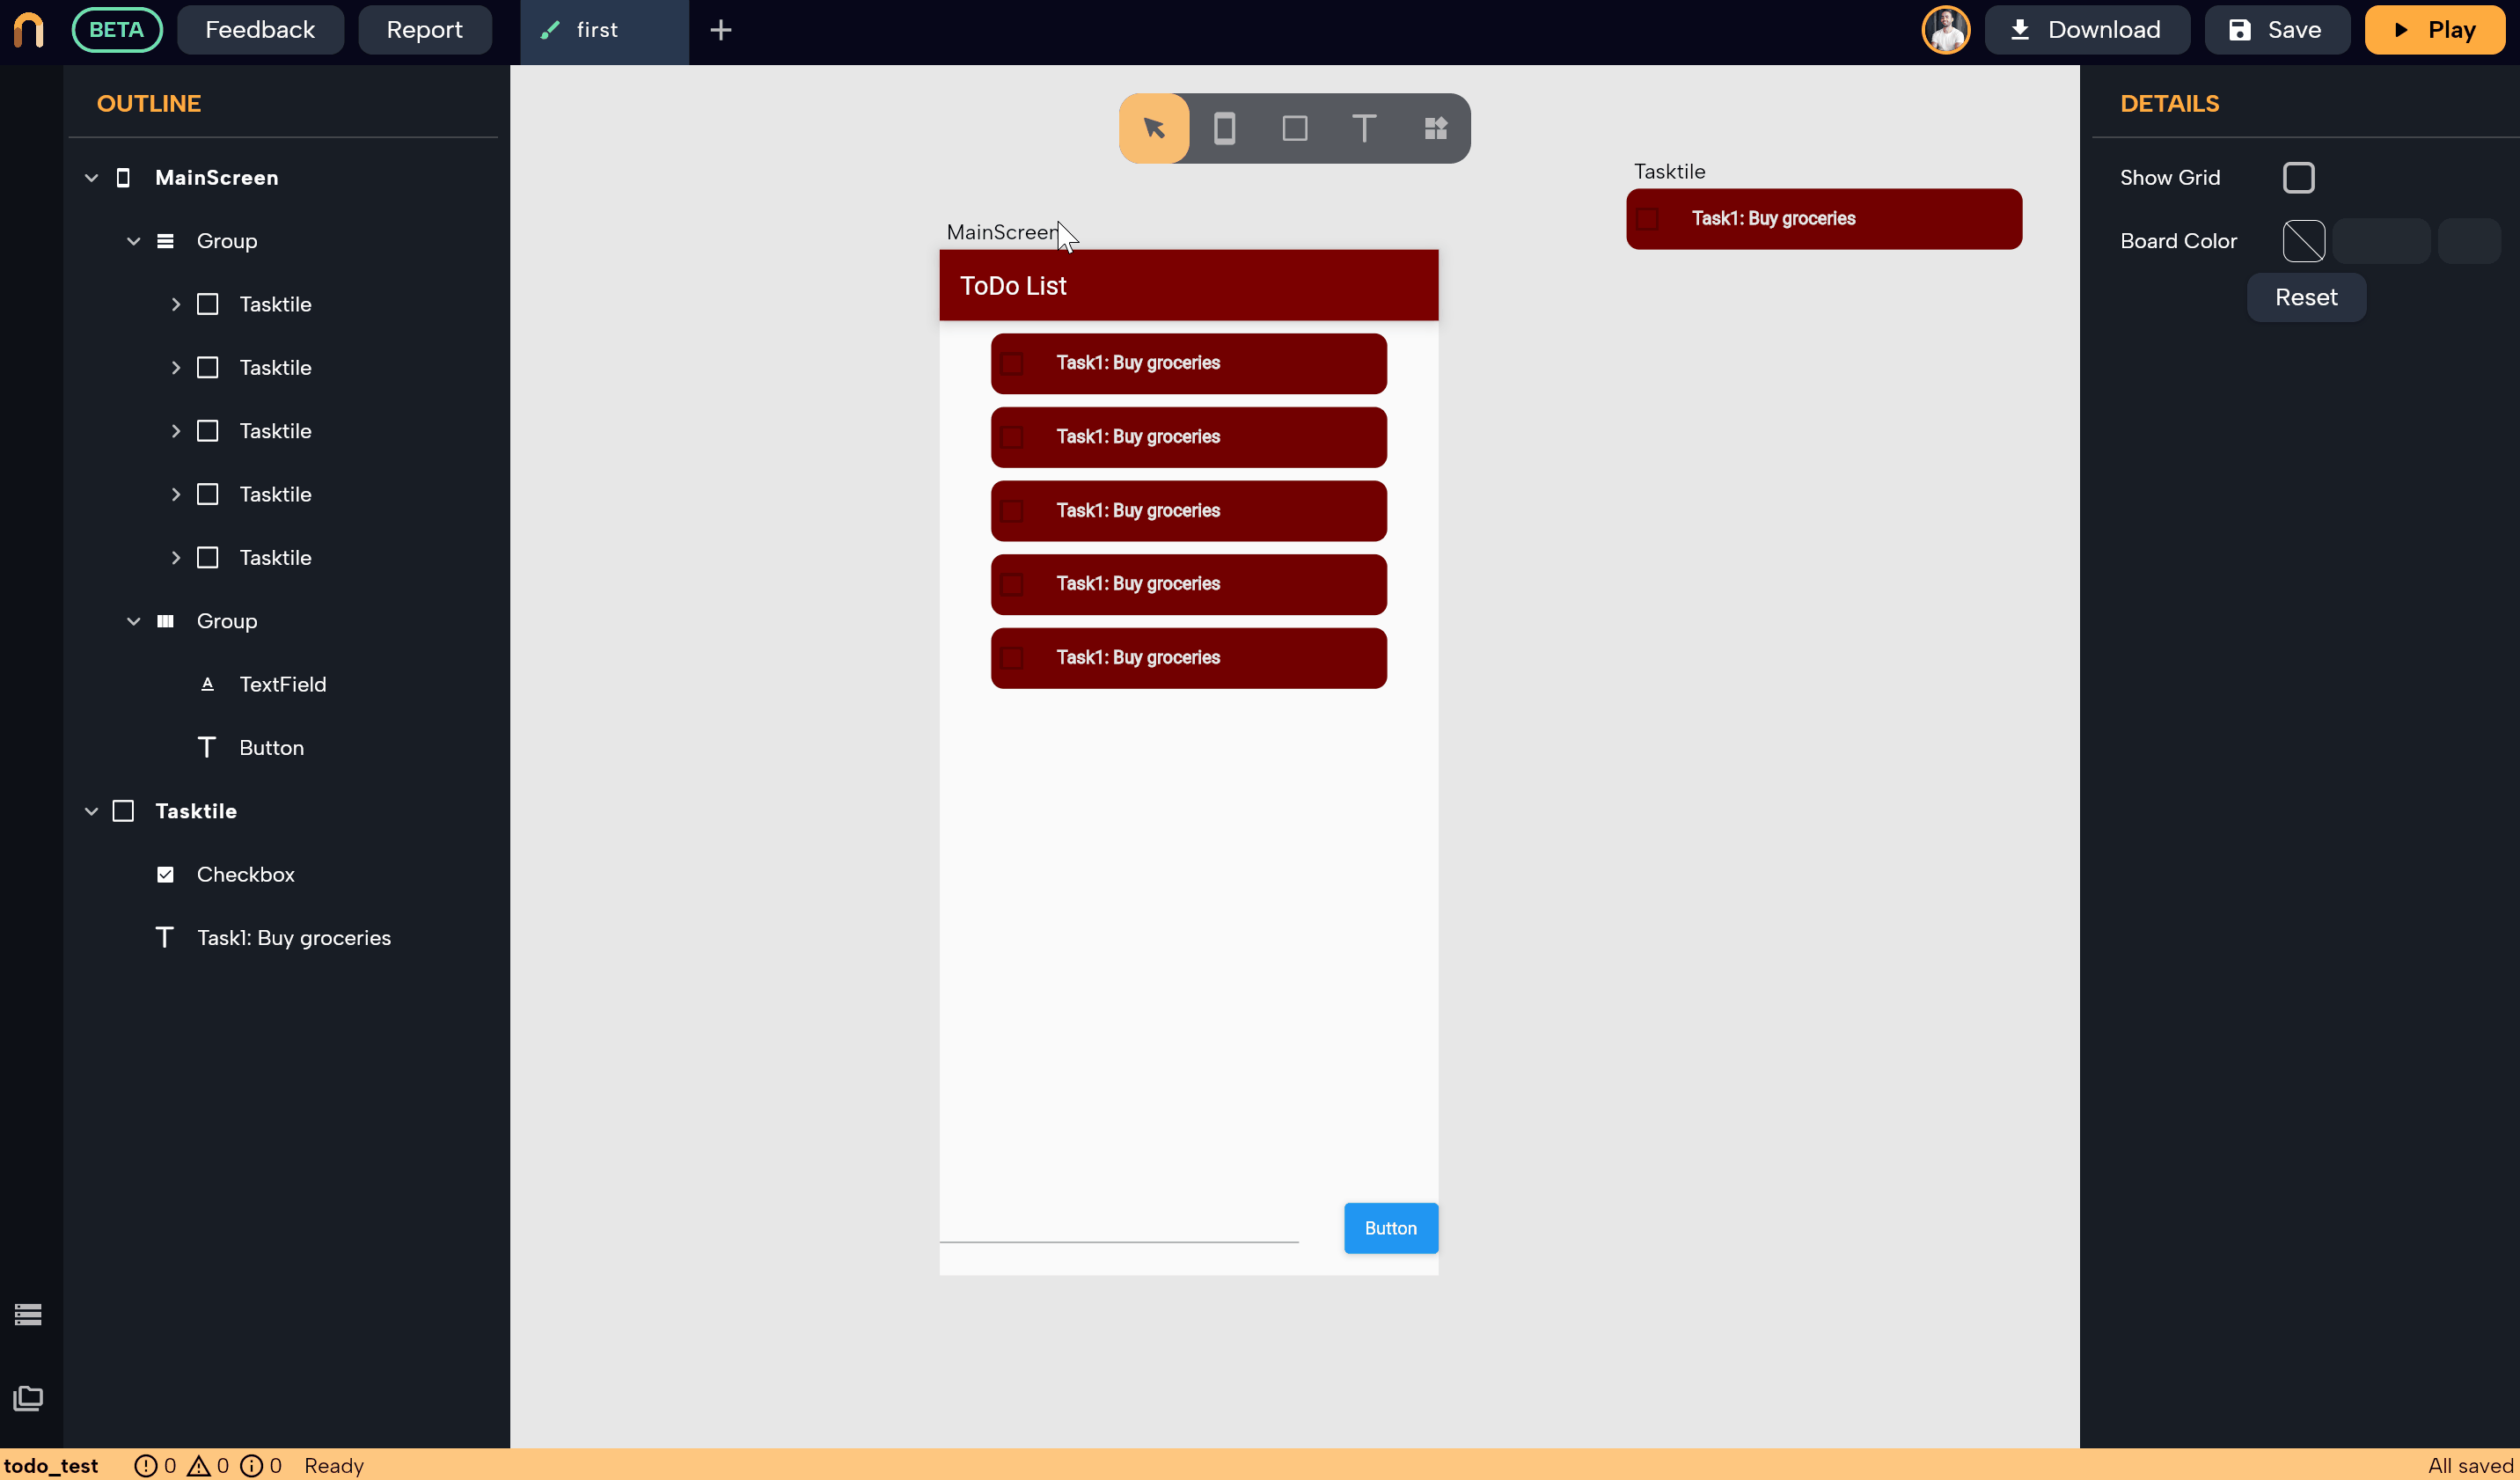
In the following example, we are creating a list called tasks that presents a list of a custom object called task that was created before. This object presents a single task and holds its name of it and a boolean whether the task is completed or not yet. the (check Objects for more information). This list will hold a list of all tasks we have and we will display them in a group for the user. Check Groups for more information
Filling Lists
There are three ways to fill a list with data:
1. Filling a List Manually
To manually fill a list:
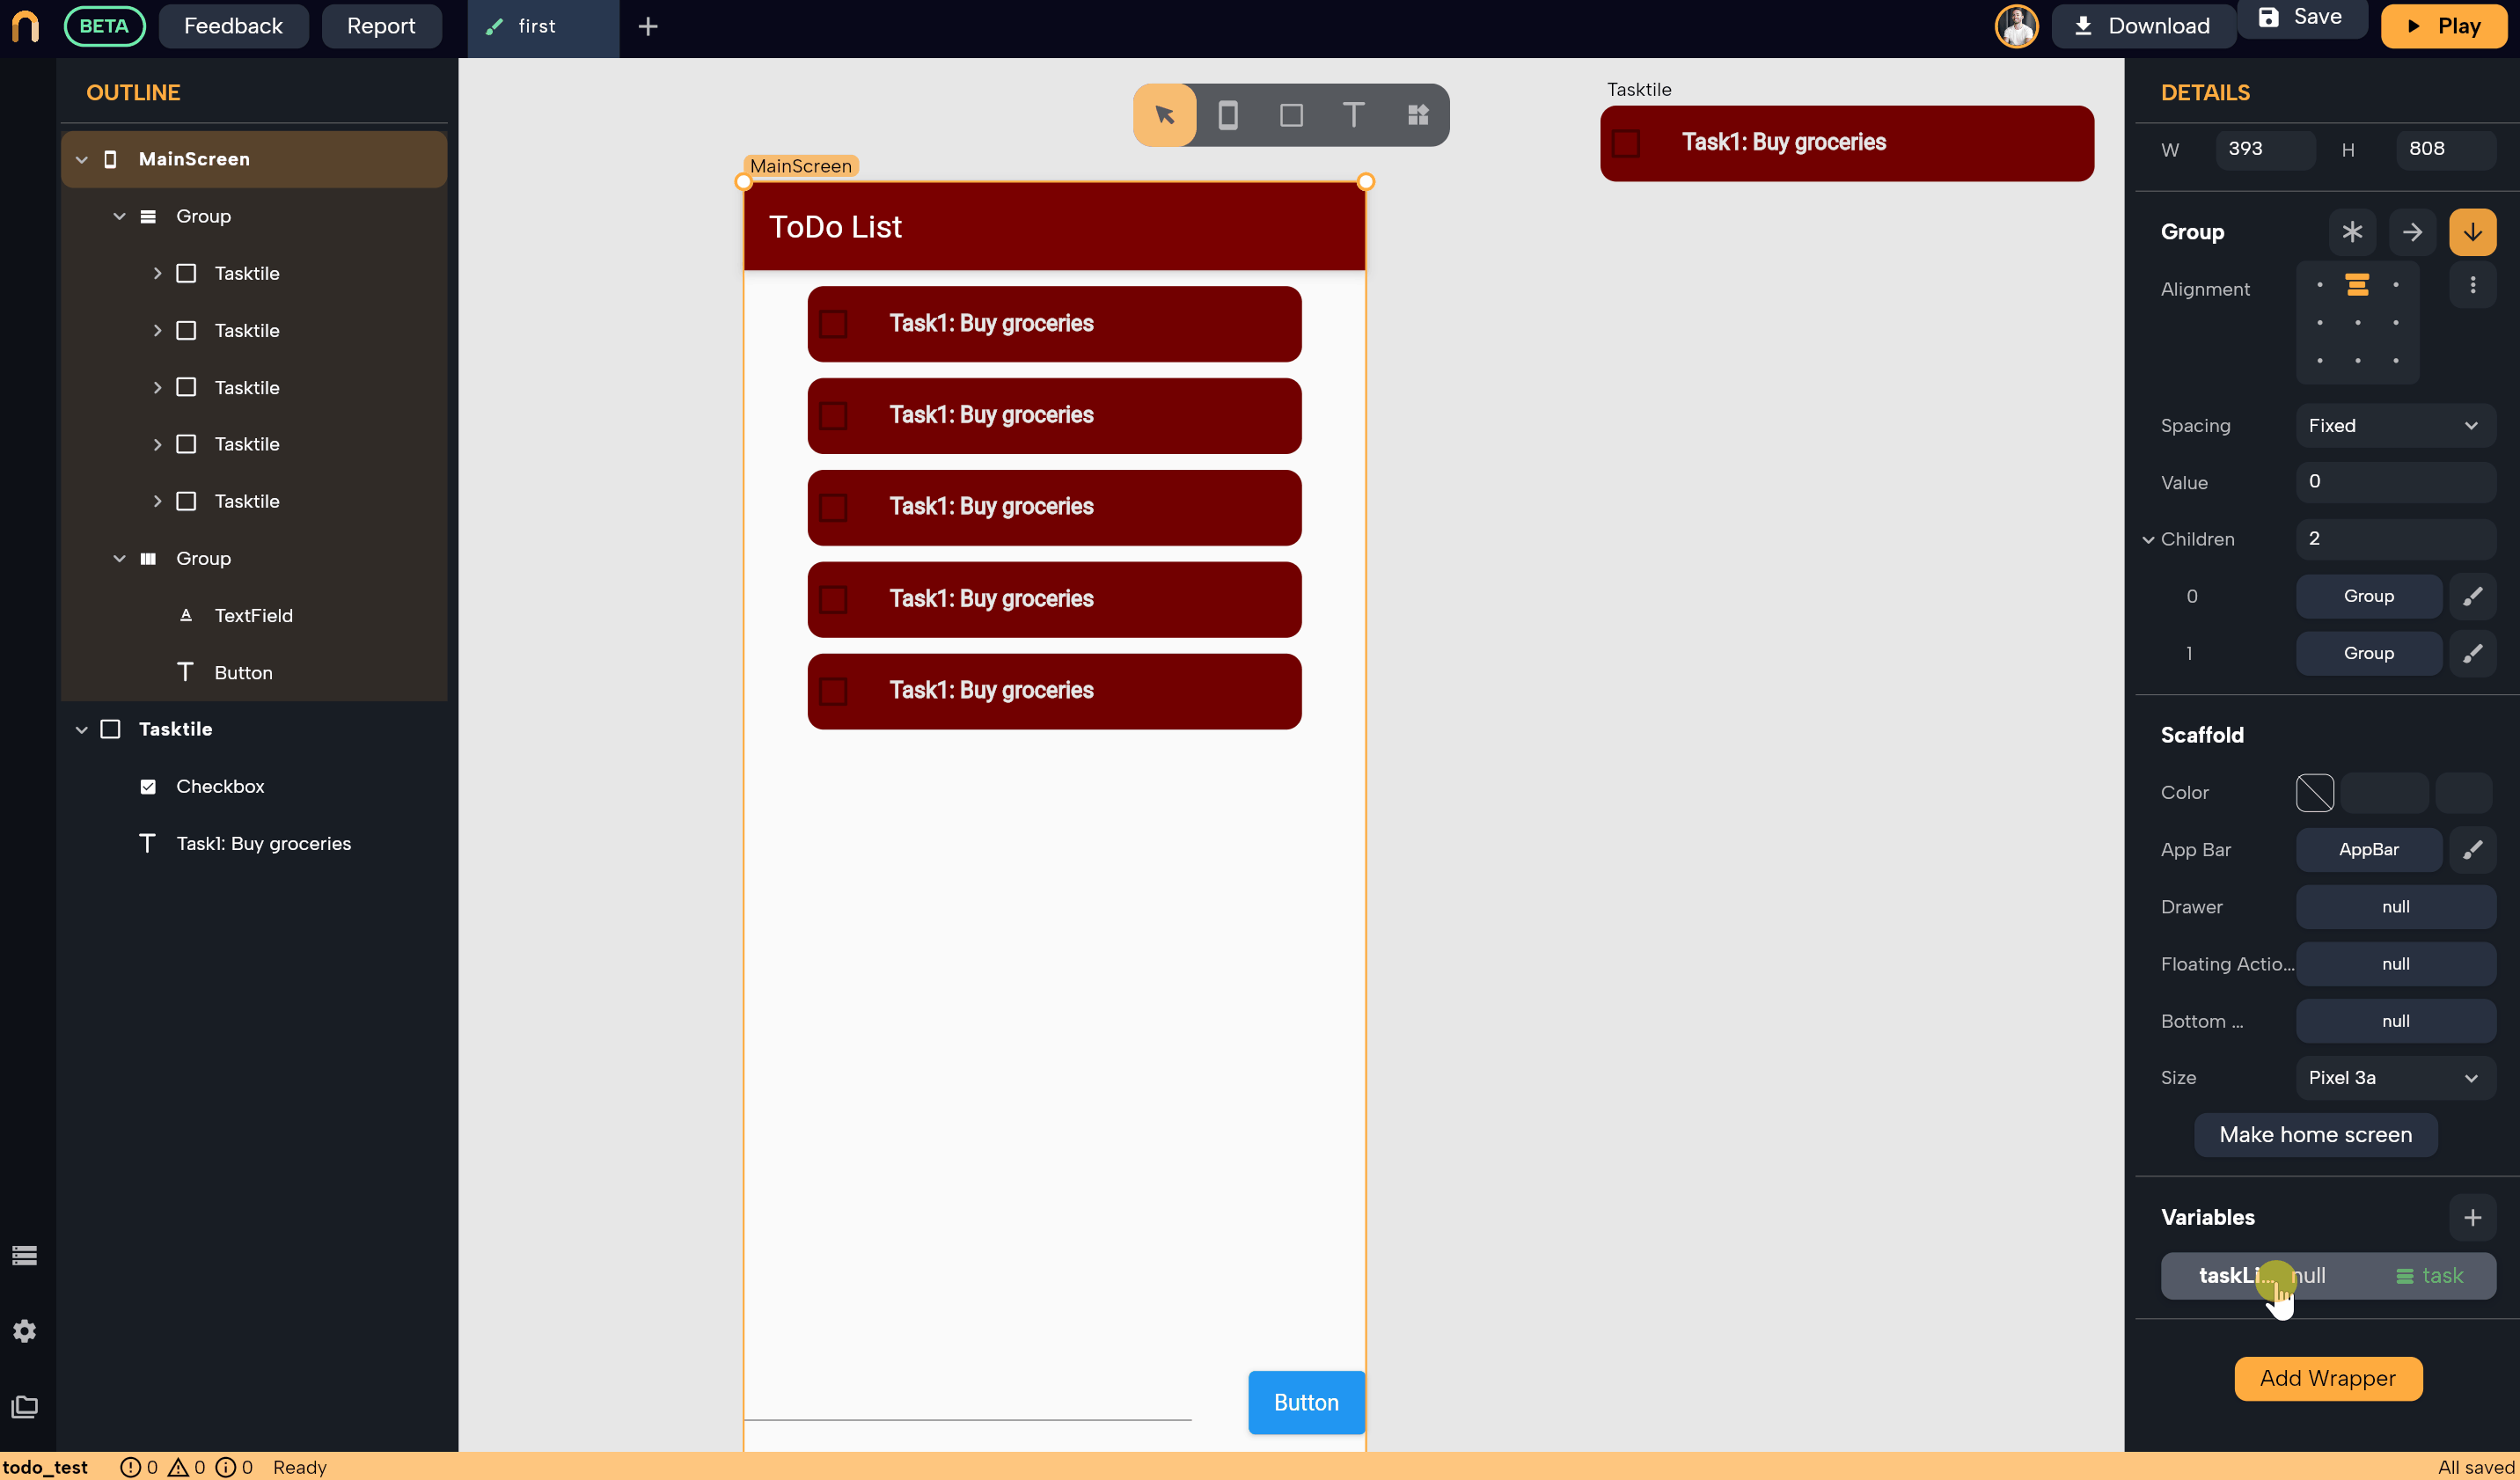
- Open the variable editing popup by selecting the screen/component and clicking on the variable in the variables section in the details panel.
- Click on the + icon next to the default value field to add an item to the list. You can modify this item as needed.
- If you include a number in the default value field, it will create that number of default items in the list. You can then change their value in the fields for each item underneath the default value field.
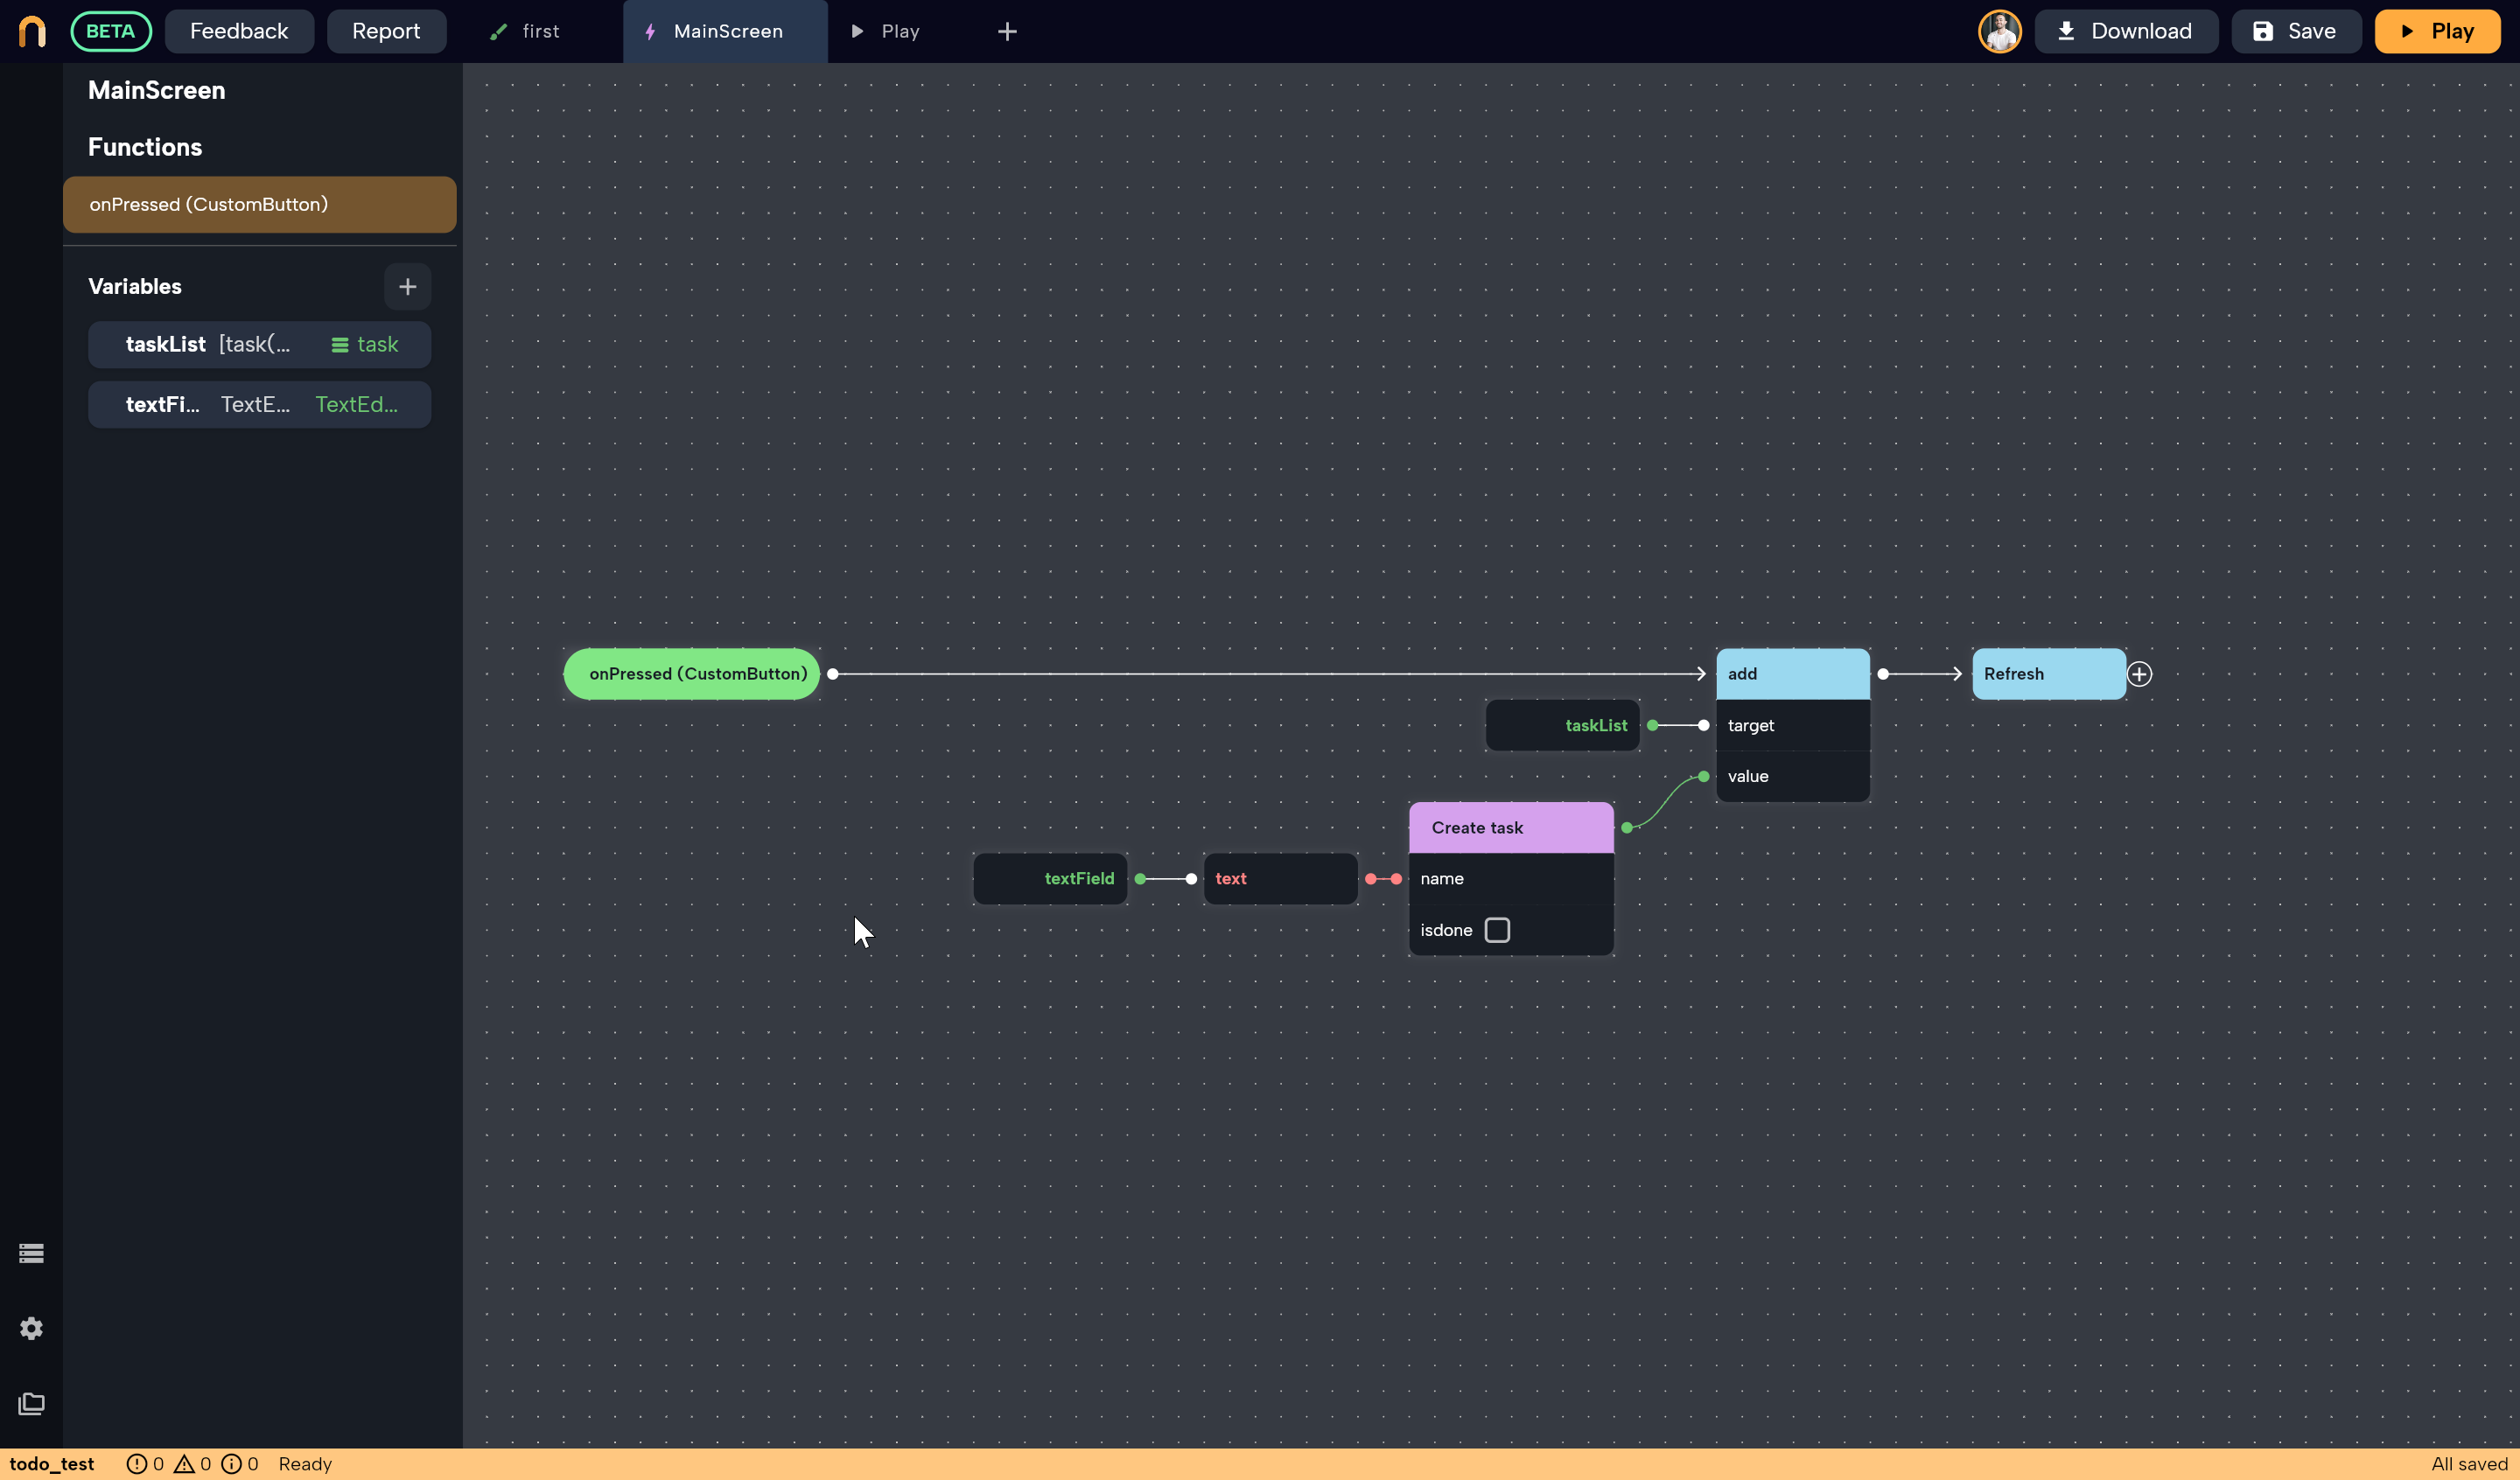
2. Filling a List Using Circuit
To fill a list using Circuit:
- Use the "add" node associated with the list variable. Drop the list variable from the Local section in the circuit, then click on + next to it to view the list of node options that can be connected to the list. Select the "add" node.
- After selecting the Add node, the list variable will automatically connect to the list using the pin target. The other available pin is value where you connect the item you want to add to the list.
Example: To-Do App logic
This logic for a to-do app of adding a task object to the list when clicking a button to add a task. The text is taken from the Textfield widget, added to a new object of type task, and then this object is added to the list taskList. The refresh node is called in the end to update the UI.
3. Filling a List from a Data Source
If you have a Data source added to your app, you can use it with Data builder widget to pass the data to the UI. For example, check out Create a request to see how to create an API get request and have the list of data injected into your screen.
Displaying Lists
There's many ways to display lists in Nowa. The optimal way is to use Listview and Gridview widgets.
The other way is using the Group widget to add a row or column
using Listview or Gridview
The optimal way to display a variable or parameter list in Nowa is usin Listview or Gridview widget in a "Builder" mode.
Check out how to use Listview and Gridview
Using groups
Using Group is the old way to display Data inside the App. The new way is to use ListView or GridView.
Read this article to learn when to use Group and when to use ListView or GridView
This way is not recommended. Use it only if you have a reason for not using Listview or Gridview widget
To display a variable list in your UI, follow these steps:
- Use a Group widget with a row or column layout. Have at least one child inside of it as a placeholder. The children inside the group will act only as a preview of how the UI will look when the group has that amount of children inside. Check out [Groups] for more information on creating groups.
- Select the group and connect its property Children with a list variable in the details panel. The children widgets will be replaced with a single widget that acts as a placeholder, which will be the first child that was in the group before connecting it to a variable list. You can change that placeholder by selecting the group and then clicking on the arrow next to the children field in the details panel to expand it, and then you will see the placeholder widget. Click on it to choose another placeholder, or click on the brush next to it to open that placeholder widget for any widget edit.
- Select the placeholder widget inside the group and connect its properties to the variables inside the single object element that each placeholder instance will receive from the group. For example, if your placeholder widget was a Text and you want to display a text coming from the list, connect the property text of the widget to a string item that is inside the element object itself. This will make each Text placeholder display different text for each item in the list.
Example: Displaying the Latest News with Nowa
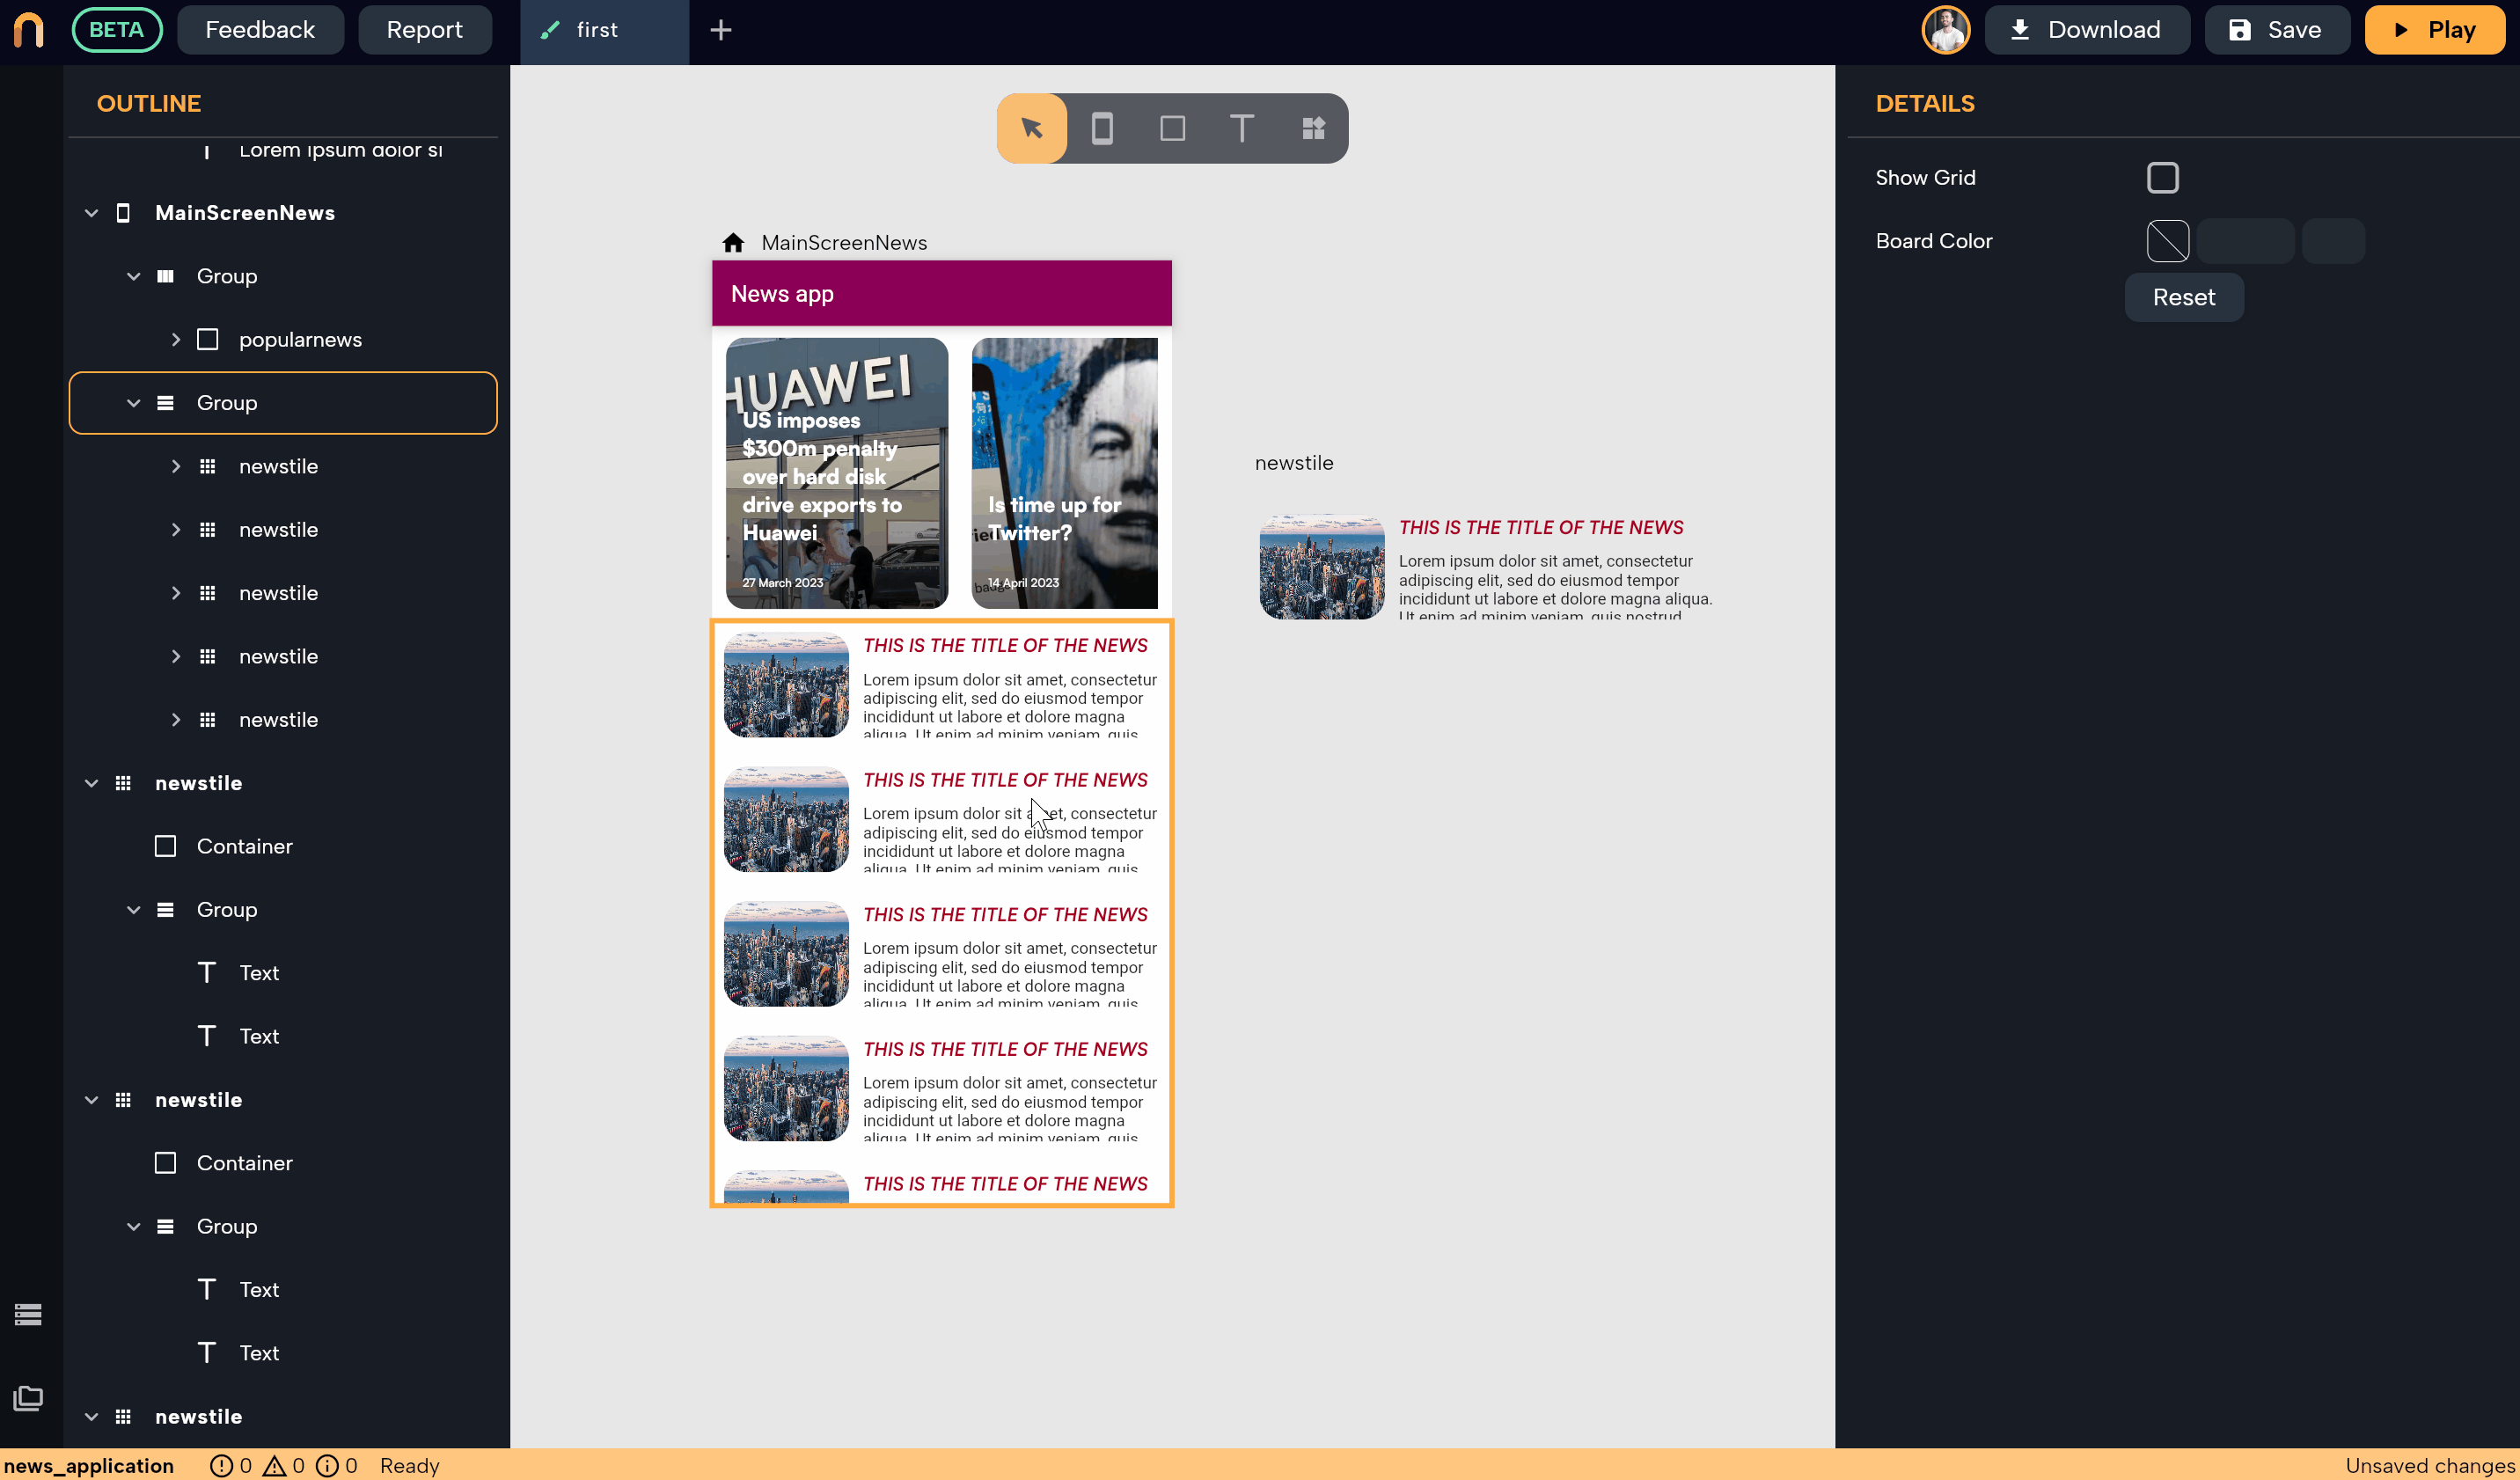
In this example, we will explain how to create an app that displays the latest news using a row group, a custom component, and an API to fetch news data.
Overview
We have an app that displays the latest news using a row group with children consisting of instances of a component called newstile. This component was created to display a single news tile and contains three widgets: an image, a title text widget, and a content text widget.
We receive our data from an API, and using the Data Builder widget, we can access the list of news loaded in the UI. The list, called records, holds all the news items. Each item in the list is an object called fields that represents a piece of news, containing three String variables: imageURL, title, and content.
Connecting Data to the Placeholder Component
Our goal is to connect these variables to their corresponding fields in the placeholder component inside the row to display the news from the API. Follow these steps:
-
Connect the list records that exists inside an object called gtnews2Obj (automatically created by the GET API request to wrap the list; see [HTTP GET] for more information) with the children property of the row. The row was created previously by simply grouping multiple copies of the component newstile (see Components and Groups for more information).
-
After connecting the list, the children of the row will be replaced with a single placeholder, which is also an instance of the newstile component. At this point, if we run the app, the row will create an instance from the placeholder for each news item it receives and pass the element object that holds the data for that particular news item to the instance.
-
The next step is to connect the data inside the element object to the variables of the instance to display the image, title, and content. To do so, select the placeholder and connect the image variable for the instance with the
imageURLfield inside the fields object that is inside element. Repeat this process for the title and content variables.
When you press play, the app will load the news and display all the news items inside the row. Each news item will be displayed inside an instance of the placeholder, which comes from the component newstile.
Don't forget to wrap the Group with Scroll View to make it scrollable
When connecting a variable that is a number or double to a text property of a text widget, make sure to use toString to convert the number to a String. This will ensure that the value is displayed correctly within the text widget.