Setting Up an API Request in Nowa
APIs (Application Programming Interfaces) are the backbone of communication on the internet. By using simple HTTP protocols, you can integrate with countless services around the world.
Learning how to use APIs correctly empowers you to build powerful and dynamic apps. Nowa provides a robust way to integrate any API into your Flutter applications visually and effortlessly.
In this guide, we'll walk through the basics of setting up an API request in Nowa. We'll cover:
- Creating a collection
- Adding common data like base URLs and headers
- Creating a GET request
- Testing the request and viewing the response
Want to continue reading? then let's get started!
1. Creating a Collection
A collection in Nowa is a group of API requests that share the same base URL and headers. This is useful when you're integrating with a service like WordPress, where multiple endpoints share common settings.
To create a new API collection in Nowa, follow these steps:
-
Open the Files panel from the left sidebar.
-
Next to the
Libfolder, click on the+icon. -
Select New API Collection.
-
Enter a name for your collection and click Create.
-
A new file will be created inside the
apifolder. Open the folder and click on the collection file to open the Collection Editor.
Notes
When creating a collection, when naming it, you will see the generated class name and the path
-
Class name: This is the name of the Dart class that will be generated in code. It acts as the interface to access requests from this collection inside Circuit. (You will see the class name under API section inside Circuit, and using that class name you will be able to call the request you need)
-
Path: This is simply the file path where the collection file will be stored.
In Nowa, everything is a Dart file—whether it's a screen, component, or API collection. This consistency makes it easier to manage and understand different parts of your app, especially when combining visual and code-based development.
📹 In the video below, you’ll see a step-by-step guide to creating a collection.
Why use a collection?
- Organization: Keep all related requests together.
- Efficiency: Set common data like base URLs and headers once for all requests in the collection.
2. Adding Common Data
After creating your collection, you can add data that is common to all requests within it.
Steps:
- Within your newly created collection, locate the settings for common data.
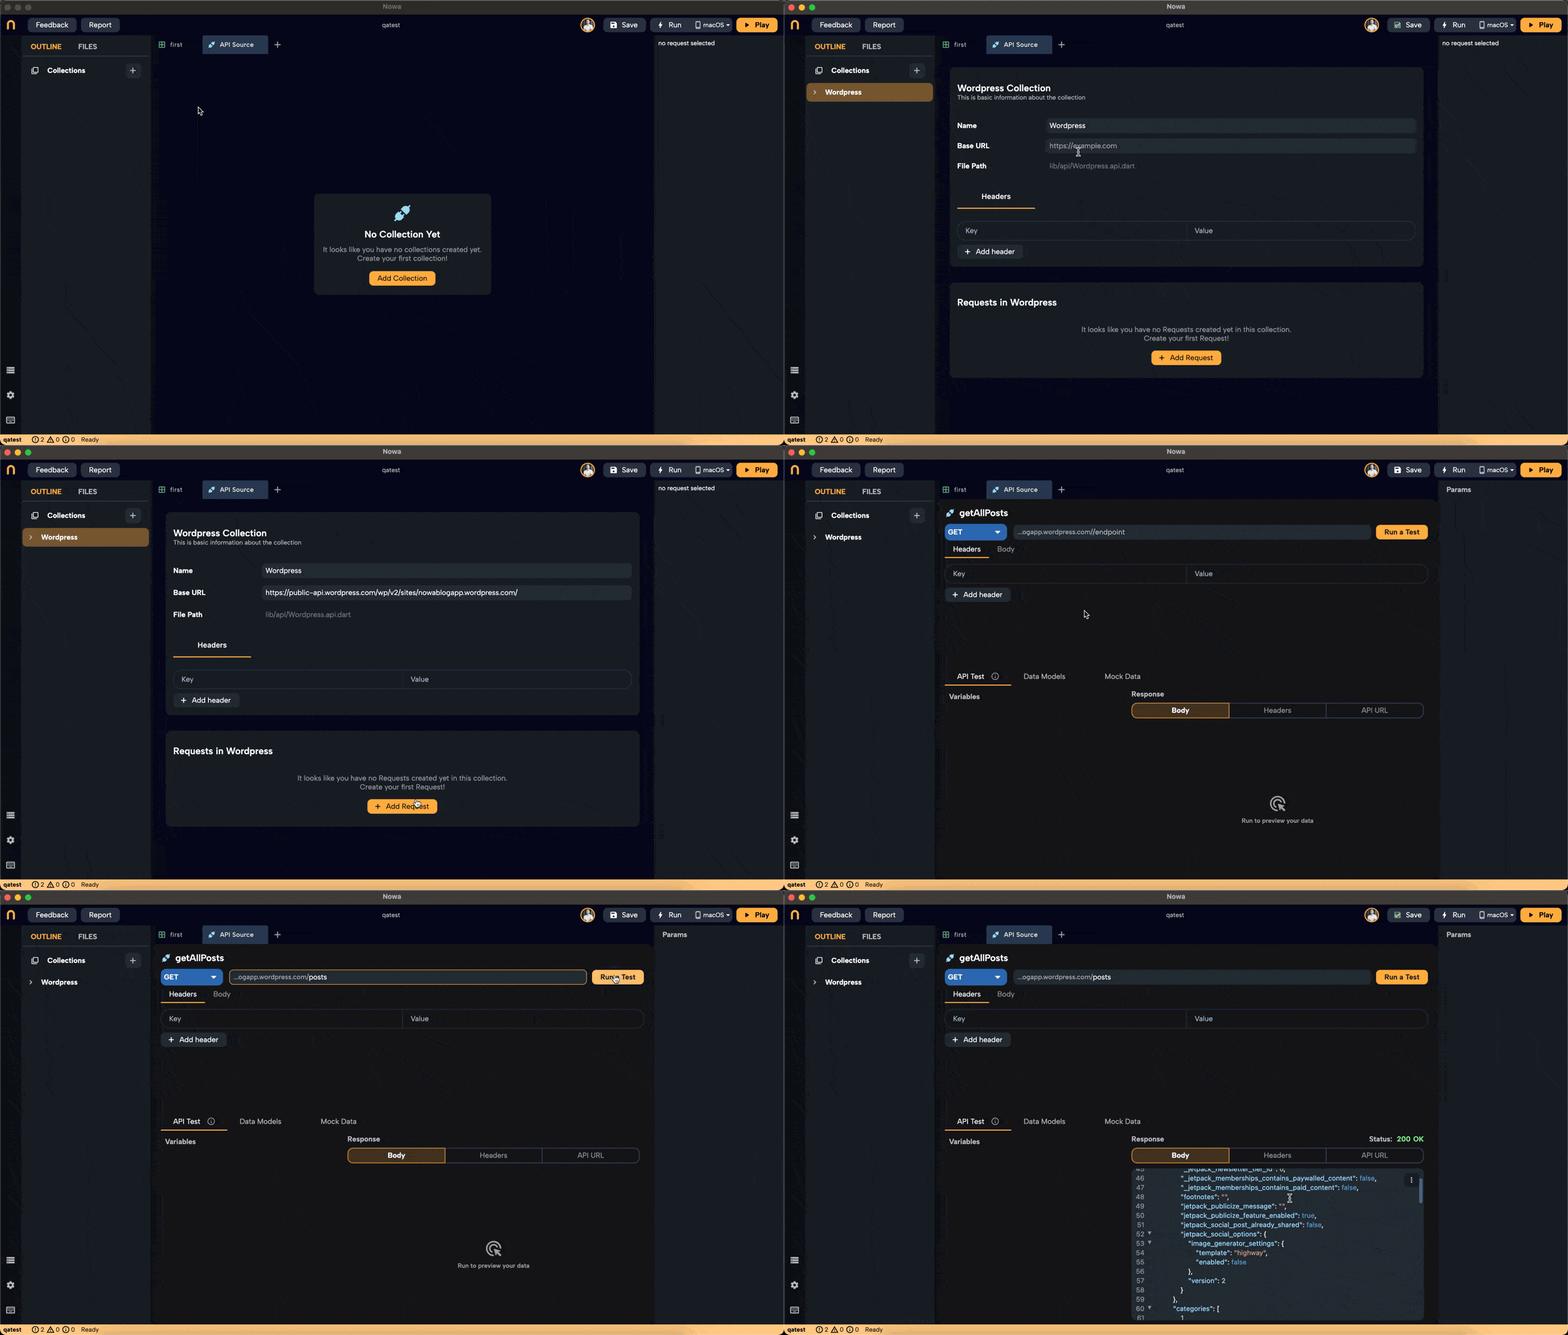
- Add the Base URL (e.g.,
https://public-api.wordpress.com/wp/v2/sites/nowablogapp.wordpress.com/). - Add any common headers that all requests will use.
3. Adding a Request
Now that your collection is set up with common data, you can add your first API request.
Steps:
- Click on Add Request within your collection.
- Choose the request type:
GET,POST,PUT,DELETE,PATCH,HEAD, orDOWNLOAD. - Enter the endpoint for the request (without the base URL). For example, to get all posts, use
posts. - Specify any additional parameters, headers, or body content specific to this request.
4. Creating a GET Request Example
Let's walk through creating a GET request to retrieve all posts from a WordPress blog.
Steps:
- Request Type: Select
GET. - Endpoint: Enter
posts. - Test the Request: Click on Run Test to execute the request.
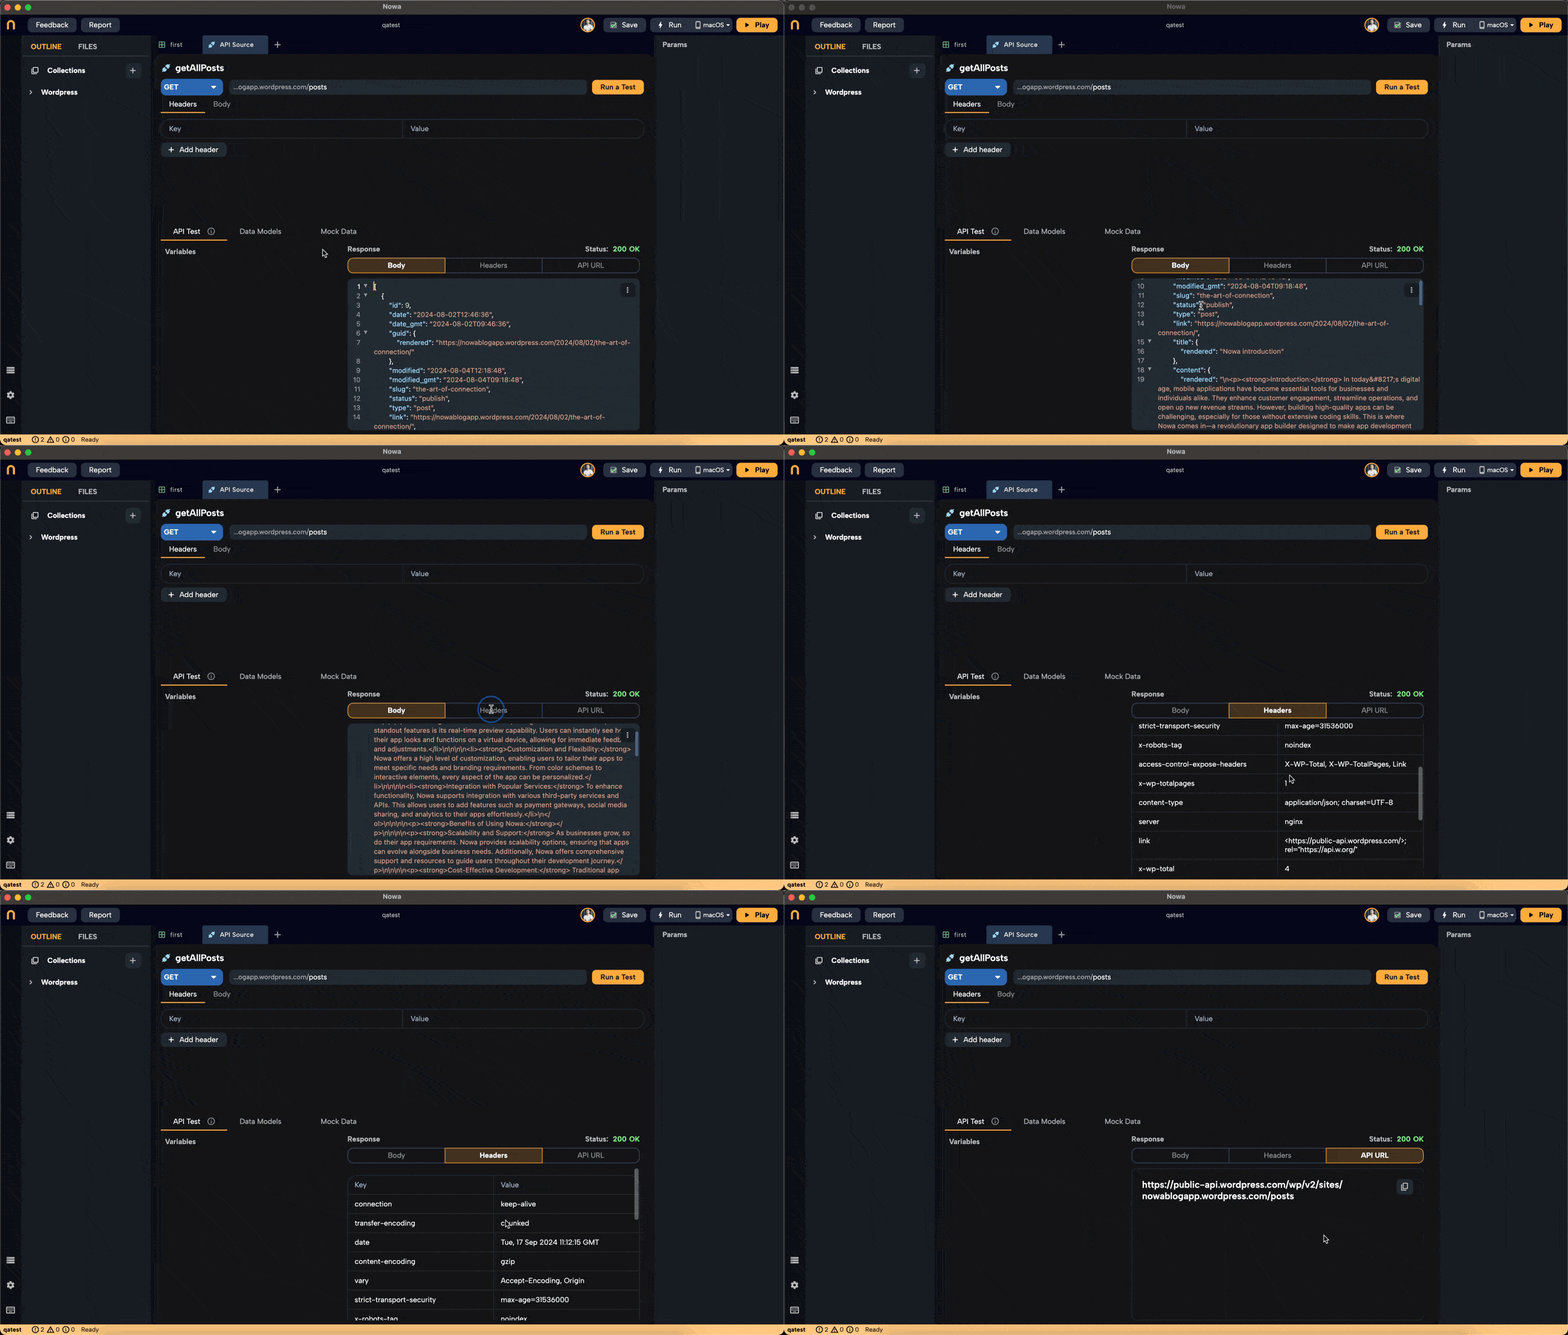
Here's the full example of creating the Wordpress collection, then the getAllPosts request

What happens next?
- Response Body: You'll see the data returned from the API in the body section.
- Response Headers: View metadata about the response.
- Full URI: Verify the complete URL used for the request, which combines the base URL and endpoint.

5. Testing and Verifying the Response
Testing your API requests ensures that they work as expected before integrating them into your app.
Steps:
- After running the test, review the response body to understand the data structure.
- Check the status code to ensure the request was successful (e.g.,
200 OK). - Examine the headers for additional information like content type and caching policies.
Next Steps
Now that you've set up a basic API request and tested it, you're ready to generate models from the response data and add mock data for design-time testing.
👉 Head to the next section to learn how to generate a model from the response.
Happy building!