Generating Models from a Request
In the previous page, we created our first API request, getAllPosts, intended to retrieve all posts from a WordPress API. After running the test and ensuring everything works correctly, it's time to generate a model from the response. This model will allow us to use the API data within our app seamlessly.
Generating a Model from the API Response
To utilize the data returned by the API, we need to convert the raw JSON response into a structured model. Here's how you can generate a model in Nowa:
Steps:
-
Run the API Test:
- Ensure you have run a test for your API request. This populates the response data needed for model generation.
(You can also generate the model using a Mock JSON, but running a test will automatically fill up the data panel to use for model generation)
-
Access Data Models:
- After running the test, click on
Data Modelsin the API request interface.
- After running the test, click on
-
Generate Model from Schema:
- Click on
Generate Model from Schema. - You will see the JSON data that Nowa will use to generate the model. If you have run a test, this area will be pre-filled with the response data.
- Note: If you cannot run a test (e.g., the API isn't ready), you can paste a mock JSON response here.
Tip: Click on the three dots in the top-right corner to beautify, copy, wrap, or compress the JSON.
- Click on
-
Select Data Fields:
- Click
Nextto proceed. - Nowa will display the data structure it plans to model.
- By default, all data fields are selected. However, it's recommended to select only the fields you need to keep the model simple and efficient.
- Example:
- For the WordPress API, we might select only
titleandcontent. - Within
titleandcontent, select therenderedfield, which contains the actual text.
- For the WordPress API, we might select only
- Click
-
Review the Model:
- Click
Nextto see the models that will be created. - You will see:
- Top-Level Model: (e.g.,
GetAllPostsModel) representing each blog post. - Nested Models: (e.g.,
Title,Content) for nested data structures.
- Top-Level Model: (e.g.,
- You can rename the top-level model and adjust the storage path if needed. By default:
- The model name is
RequestName+Model. - The path is the
/modelsfolder.
- The model name is
- Click
-
Generate the Model:
- If everything looks good, click
Generateto create the models.
- If everything looks good, click
Here's the full example of generating the model for getAllPosts request:
Understanding the Generated Models
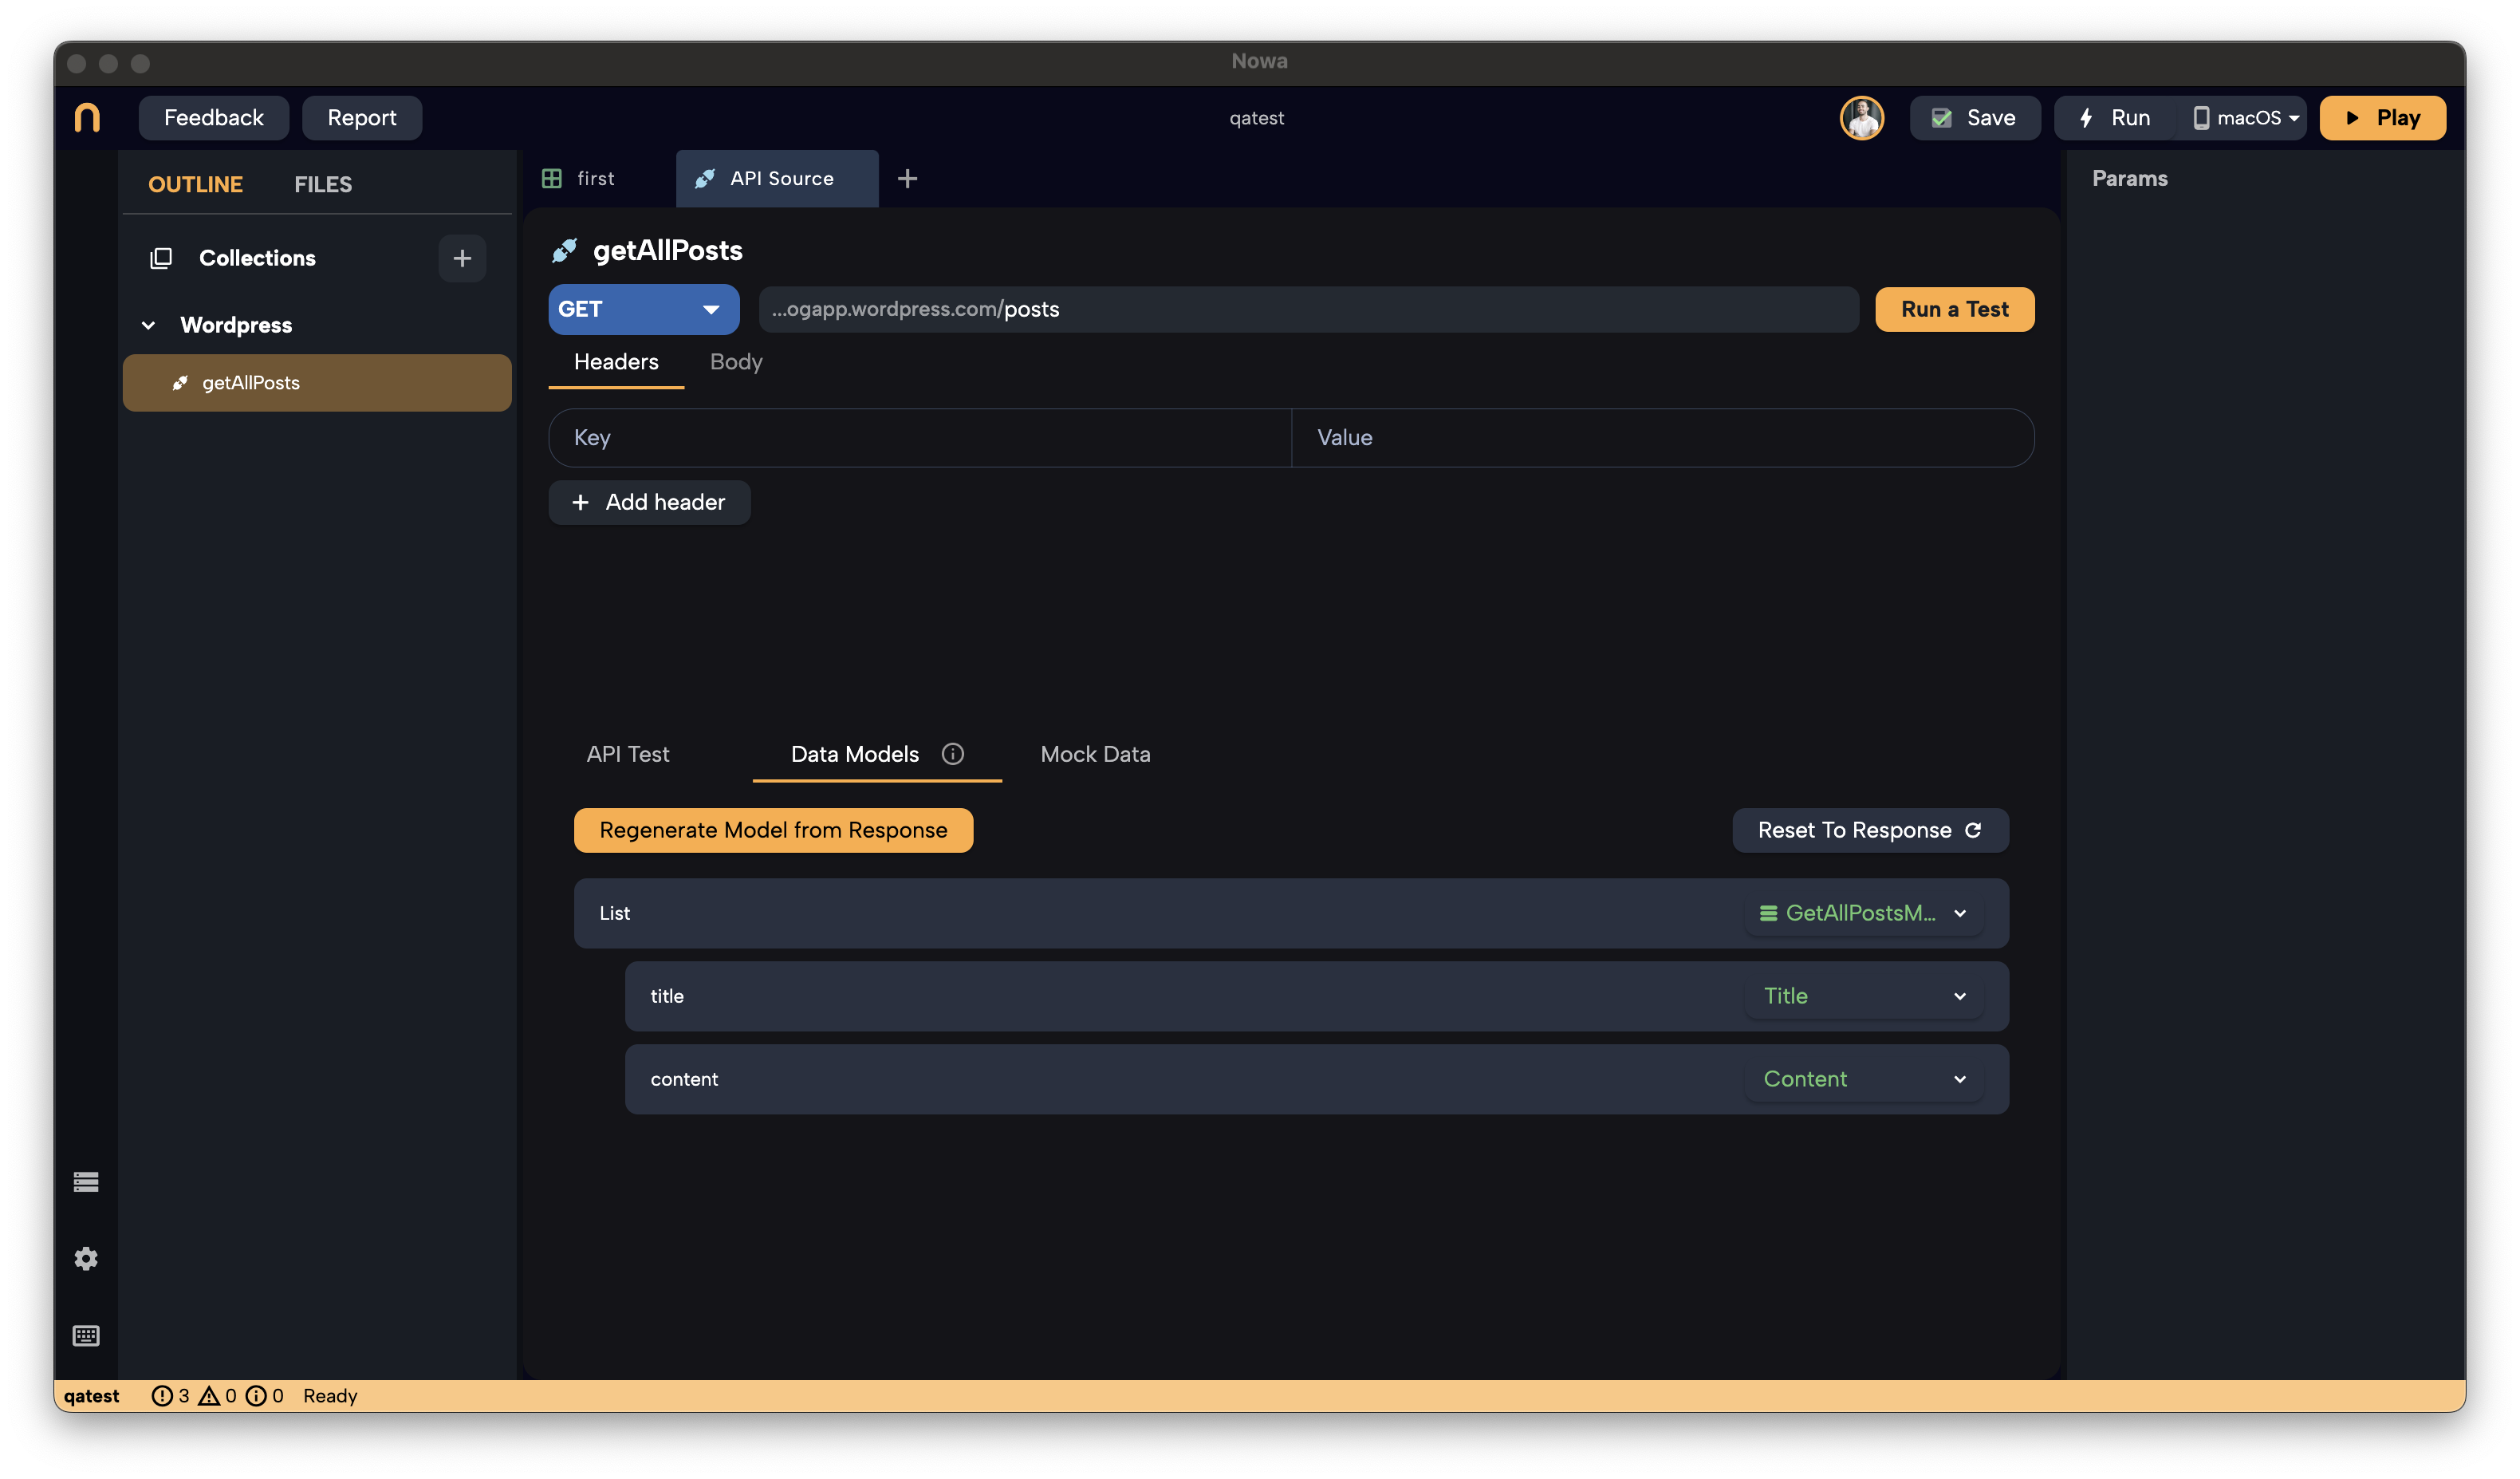
-
List of
GetAllPostsModel:- Represents a list of blog posts.
- Each item includes the
TitleandContentmodels.
-
TitleandContentModels:- Contain the
renderedproperty, which holds the text for each post's title and content.
- Contain the
What's Next?
Now that the model is generated, you have a structured representation of your API data. From here, you can:
-
Connect the Request to the UI:
- Use the data in your app's screens by wrapping UI elements with a data builder.
- This allows you to display dynamic content retrieved from the API.
-
Modify Mock Data (Optional):
- Access the
Mock Datasection to view or edit the mock data. - Mock data is used during design time to prevent unnecessary API calls.
- It's helpful for testing how your UI will look with actual data.
- Access the
What's coming Next:
-
[Using the Request in the UI]
- Learn how to integrate the API request and models into your app's interface.
-
Working with Mock Data
- Understand how to utilize mock data effectively during development.
-
Adding Parameters and Advanced Requests
- Explore how to add parameters to your requests and handle
POSTrequests using the Circuit (logic editor).
- Explore how to add parameters to your requests and handle
Proceed to the next section to learn how to use the request in the UI and continue building your app's functionality.