Date Picker in Nowa
You can easily enable users to pick a date inside your app using Nowa’s built-in Date Picker feature.
A date picker is useful in many common app scenarios:
- Booking or reservation apps to select check-in/check-out dates
- To-do or task apps where users need to choose due dates
- Reminder or scheduling apps
- Tracking events like birthdays, anniversaries, or deadlines
How to Implement a Date Picker in Nowa
To add a Date Picker in your app:
-
Open the event or function you want to add the Date Picker to.
Example: "On Pressed" event for a button. -
Click the small node inside the Circuit to add a new node.
-
In the nodes menu:
- Open the Globals category
- Choose the
showDatePickernode
-
In the details panel of the node:
- Set the
firstDate(e.g.,1/1/2012) - Set the
lastDate(e.g.,1/1/2030) - The initial date will default to the current date
- Set the
firstDate and lastDateYou need to set the first date and the last date to specify the range of the dates that will be displayed
-
Understand the return type:
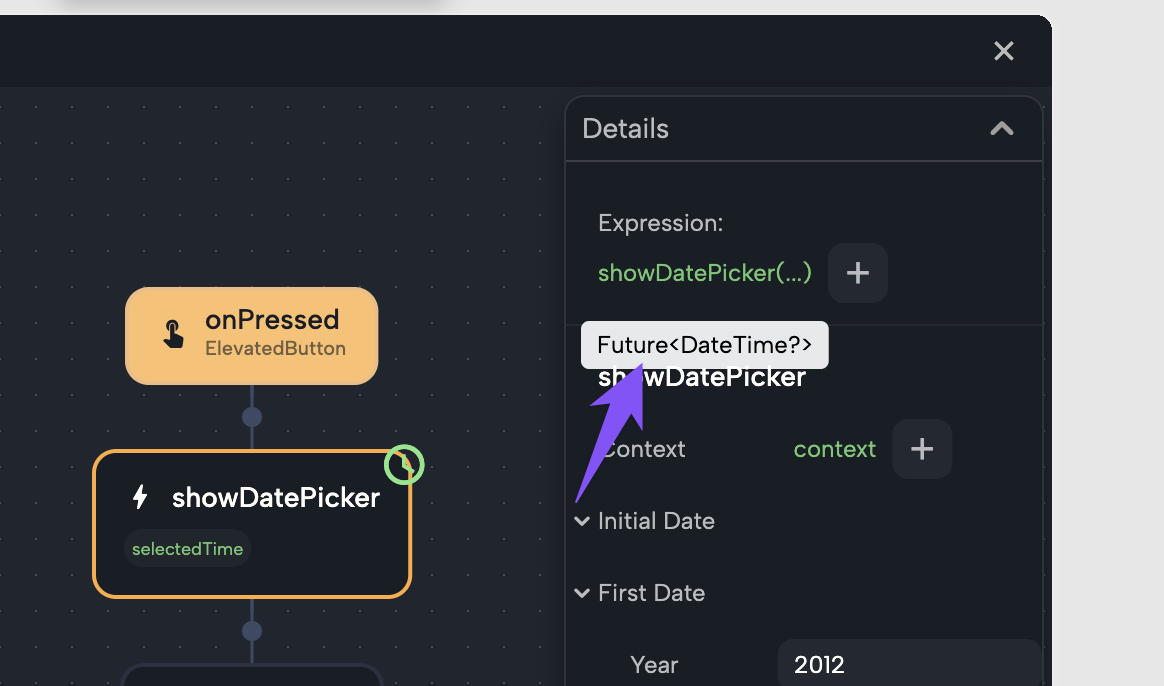
- When you hover over the node, you'll see it returns a
Future<DateTime> - In Flutter, a
Futuremeans the result will be available later. Since the user must interact and choose a date, the result won’t be ready immediately — that's why it's aFuture. - You can turn on
awaitso the function waits until the user picks a date. Once the user selects a date, the node continues execution.
- When you hover over the node, you'll see it returns a
-
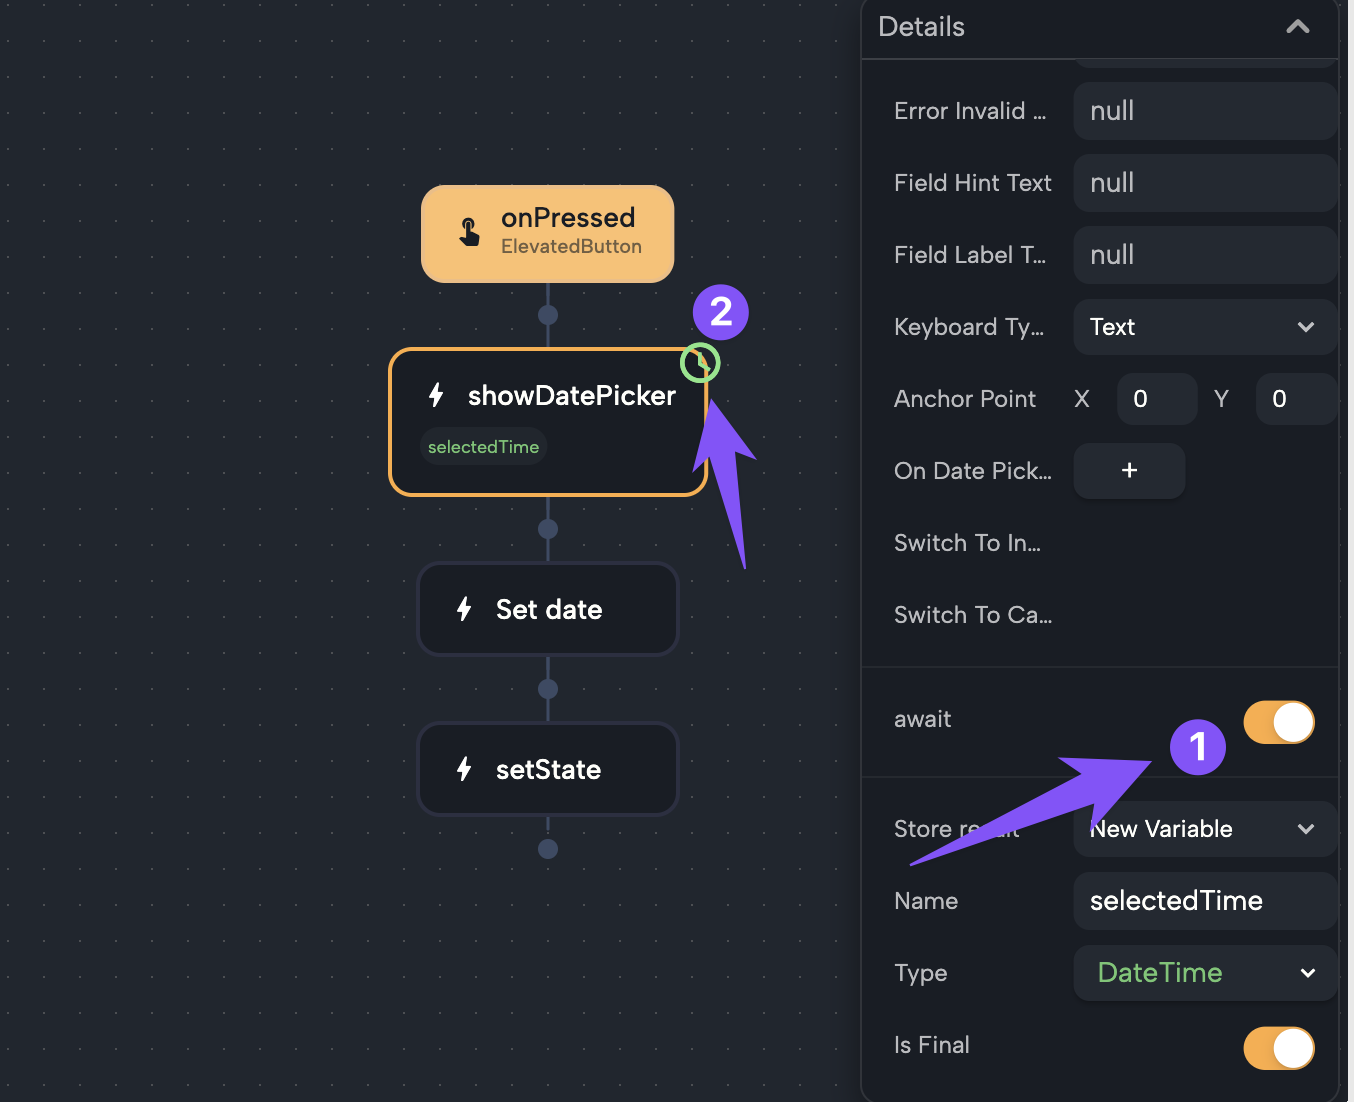
When
awaitis enabled:- You can store the result directly in a new or existing variable
- The variable must be of type
DateTime
-
When
awaitis not enabled:- You can keep
awaitoff and use theOn Valueoption instead - This means the function will not pause at the node, but will continue execution immediately
- When the user picks a date, the logic inside
On Valuewill be triggered - Inside the
On Valueblock, you'll have access to a parameter calledvalueof typeDateTime, which represents the selected date - You can use this
valueto perform any follow-up logic or store it in a variable
- You can keep
-
In the
store resultdropdown:- Choose to store the date in a new variable (which will be of type
DateTime) - Or store it in an existing
DateTimevariable
- Choose to store the date in a new variable (which will be of type
If the user closes the Date Picker without selecting a date, the node will return null.
Full Example: Pick a Date and Display It
In this example video, we show a real use case:
- A screen contains a Text widget and a button labeled "Pick a date"
- We already have a variable called
date(String) connected to the Text widget
Steps used:
-
Inside the "On Pressed" event of the button:
- Add
showDatePicker - Set
firstDateto1/1/2012 - Set
lastDateto1/1/2030 - Enable
await - Store the result in a new
DateTimevariable calledselectedDate
- Add
-
Format
selectedDate:- Open the nodes menu > Locals > and choose the variable
selectedDatethat was created before - Inside the Expression section in the details panel, click on + next to the
selectedDateadd choose theformatfunction. - Choose a format which is
YEAR_NUM_MONTH_DAYwhich outouts Month/Day/ Year (More on the formatting styles below) - Store the formatted string result in the existing
datevariable
- Open the nodes menu > Locals > and choose the variable
-
Call refresh to update the UI and show the new date in the Text widget (Since we updated the value of the
datevariable, we need to call refresh to update the UI). -
Play the app — when the user taps "Pick a date," the Date Picker appears. After selecting a date, it shows up in the Text widget.
Formatting Dates
To show a selected date as a human-readable string, use the format function on a DateTime variable.
- Format returns a String version of the date in a specific format
- You can choose from multiple formatting styles depending on how you want to display the date
How to Use:
- After storing the
DateTimeresult, callformaton that variable - Choose the format from the menu
- Store the result in a
Stringvariable - Use it in Text widgets or anywhere else
Format Options
Here are the available formatting options (as seen in the menu screenshot):
| Format Name | Description | Example Output |
|---|---|---|
DAY | Day of the month | 24 |
ABBR_WEEKDAY | Abbreviated weekday | Mon, Tue |
WEEKDAY | Full weekday name | Monday, Tuesday |
ABBR_STANDALONE_MONTH | Short month name | Jan, Feb |
STANDALONE_MONTH | Full month name | January, February |
NUM_MONTH | Numeric month | 01, 12 |
NUM_MONTH_DAY | Numeric month and day | 04/10 |
NUM_MONTH_WEEKDAY_DAY | Month, weekday and day | Thu, Apr 10 |
ABBR_MONTH | Abbreviated month name | Apr, May |
ABBR_QUARTER | Abbreviated quarter | Q1, Q2 |
QUARTER | Full quarter name | 1st quarter |
YEAR | Full year | 2025 |
YEAR_NUM_MONTH | Year and month number | 2025/04 |
YEAR_NUM_MONTH_DAY | Year/Month/Day | 2025/04/10 |
YEAR_NUM_MONTH_WEEKDAY_DAY | Full breakdown with weekday | Thu, 2025/04/10 |
YEAR_ABBR_MONTH | Year and abbreviated month | 2025 Apr |
YEAR_ABBR_MONTH_DAY | Year, abbreviated month, and day | 2025 Apr 10 |
YEAR_ABBR_MONTH_WEEKDAY_DAY | With weekday | Thu, 2025 Apr 10 |
YEAR_MONTH | Full year and month | 2025 April |
YEAR_MONTH_DAY | Full year/month/day | 2025 April 10 |
YEAR_MONTH_WEEKDAY_DAY | Full breakdown | Thursday, April 10, 2025 |
YEAR_ABBR_QUARTER | Year and abbreviated quarter | 2025 Q1 |
YEAR_QUARTER | Year and full quarter | 2025 1st quarter |
HOUR24 | Hour in 24h format | 17 |
HOUR24_MINUTE | Hour and minute | 17:30 |
HOUR24_MINUTE_SECOND | Hour, minute, second | 17:30:15 |
HOUR | Hour in 12h format | 5 PM |
HOUR_MINUTE | Hour and minute in 12h | 5:30 PM |
HOUR_MINUTE_SECOND | Hour, minute, second in 12h | 5:30:15 PM |
MINUTE | Minute only | 30 |
SECOND | Second only | 15 |
MINUTE_SECOND | Minute and second | 30:15 |
With this setup, you can now integrate a fully functional, user-friendly date selection feature into your app in just a few steps.