Queries
In this guide, we’ll walk through how to set up your database and configure Row Level Security.
What is Queries?
Queries are how you interact with your Supabase database to fetch or update information. They define what data you want and how it’s made available in your app’s frontend.
What is Row Level Security (RLS)?
RLS is used to enforce policies that determine who can view, add, edit, or delete records in a table.
Most Frequently Used Queries
SELECT – retrieve data
You can use SELECT when you want to get information from one or more tables.
-- You want to show all students in your class 10A
SELECT id, name, class
FROM students
WHERE class = '10A';
INSERT – add data
You can use INSERT when you need to add new records into your table.
-- You want to add a new student record
INSERT INTO students (name, class, phone)
VALUES ('Ada Lovelace', '10A', '555-0100');
UPDATE – modify data
You can use UPDATE when you want to change values that are already in your table.
-- You want to fix a student’s phone number
UPDATE students
SET phone = '555-0199'
WHERE id = 42;
DELETE – remove data
You can use DELETE when you want to remove rows from your table.
-- You want to Delete a student once you no longer need their record
DELETE FROM students
WHERE id = 42;
Step 1: Create the table & security policies
If you need to create a table that will store todos.
We created an example for you that builds a table with automatic IDs and timestamps, and sets up security so every user can only manage their own todos.
Open your Supabase project, then click on SQL Editor and paste this SQL snippet.
CREATE TABLE todos (
  id uuid DEFAULT gen_random_uuid() PRIMARY KEY,
  created_at timestamptz DEFAULT now() NOT NULL,
  user_id uuid REFERENCES auth.users(id) NOT NULL,
  task text NOT NULL,
  is_complete boolean DEFAULT false NOT NULL
);

ALTER TABLE todos ENABLE ROW LEVEL SECURITY;

CREATE POLICY "Users can view their own todos." ON todos
  FOR SELECT USING (auth.uid() = user_id);

CREATE POLICY "Users can create their own todos." ON todos
  FOR INSERT WITH CHECK (auth.uid() = user_id);

CREATE POLICY "Users can update their own todos." ON todos
  FOR UPDATE USING (auth.uid() = user_id);

CREATE POLICY "Users can delete their own todos." ON todos
  FOR DELETE USING (auth.uid() = user_id);
Other ways to do:
You don’t always have to write SQL queries — you can also create tables visually or even let Supabase AI help you out!
Supabase AI:
Click AI Assistant, type what you want it to do, click Run Query then Run, and go to the Table Editor to check the results.
Create table visually:
Open the Table Editor, click New Table, enter a name, adjust the required settings, and click Save.
Step 2: Generate a query
We built Nowa AI to understand your database structure, so you don’t need to write SQL queries or remember column names, just use plain English, and Nowa will handle it for you.
Click the + icon, enter your prompt, then click Generate.
Single query or multiple queries
You can choose whether to generate a single query or multiple queries at the same time.
Single query
You can generate single query at same time.
Example prompt:
“Generate a query to add a task for a user.”
Multiple queries
You can generate multiple queries at same time.
Example prompt:
“Create queries for updating a task, marking it as done, and deleting.”
Generated Queries
You can see an icon next to the query name that shows the type of query
Modify generated code
Nowa also gives you control to fine-tune your queries.
You can manually edit the code, or you can ask AI to modify it for you if you want.
Step 3: Test your query
You can try out your query.
Click on your generated query, add a value to the required field, and then click on the Play button.
You need to be signed in to run queries (because RLS checks your identity).
Check your Supabase table to see the changes in the Table editor.
Examples:
These examples help you understand how to run a query.
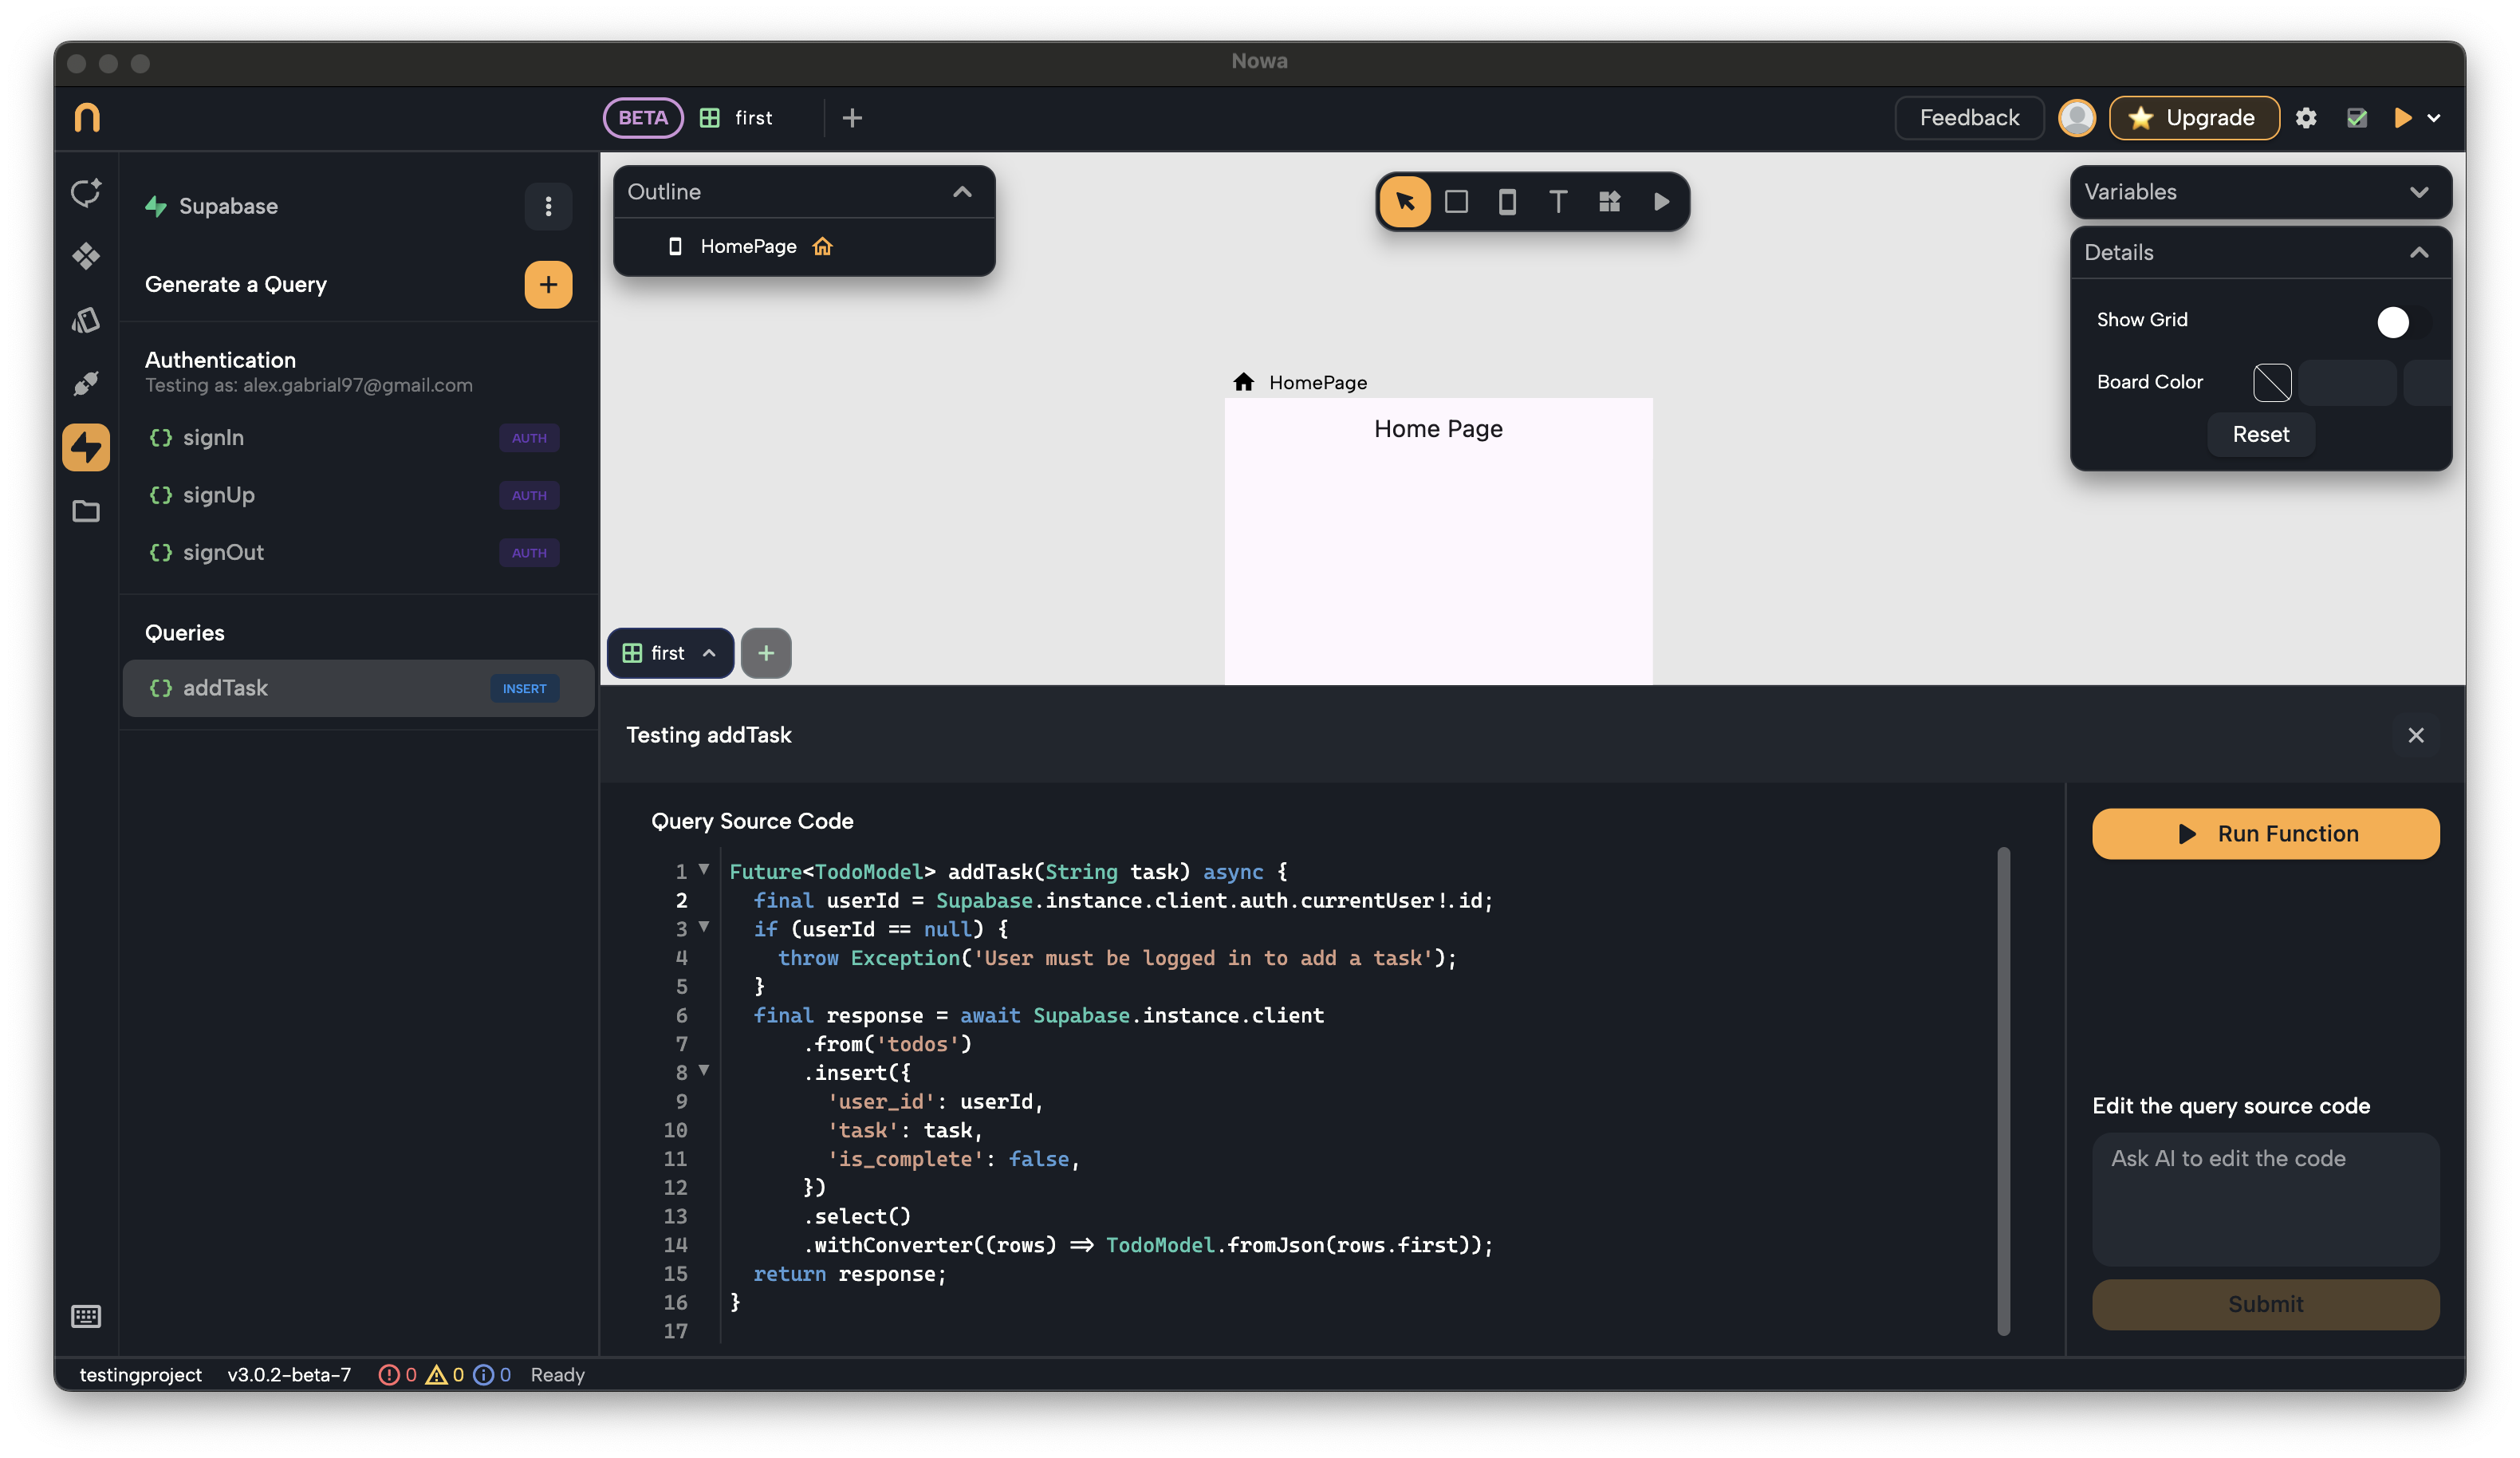
Example 1: Add Task
You can add a task, here’s how:
Click on addTask, enter 'Buy milk' in the task field, and then click the Play button.
Example 2: Update task
You can change a task, here’s how:
Click on the updateTask query, copy the taskID from the Supabase table, add the new task, and then click the Play button.