POST API Request
Welcome! In this guide, you walk through how to set up a POST API request in Nowa.
1️. Create the API Request
You can begin by creating a new API Request inside Nowa .
Here’s how:
- Click the Plus icon.
- Select New request.
- Give it a name.
- Click on Create.
- Click on the created request.
2️. Configure the URL & Method
If you want to send data, you need to change the request to the POST method.
Here’s how:
- Click on GET and change it to POST from the list.
- Paste the URL into the field.
3. Adding Headers
In the previous page, we wrote about headers. if you're not familiar with them. Click here
3️.1 Add Authorization Header
Most APIs need proof that you’re allowed to use them, so you need to add the line Authorization: Bearer <your_token> to the request header in this case — but this depends on which API you use.
Most of the time, the text before the colon is the key, and the text after the colon is the value.
Click Add header +, then set the key to Authorization and the value to Bearer <your_token>.
3.2 Add Content-Type Header
The backend need to know the format of the data you need.
The following list gives you an overview of the most commonly used formats.
application/json
application/xml
application/x-www-form-urlencoded
multipart/form-data
text/plain
application/yaml (or text/yaml)
application/protobuf
application/graphql
In this example we show you how to use Json.
Click Add header +, then set the key to Content-Type and the value to application/json.
4. Create Input Parameter
You can set up a parameter (e.g., textinput) that updates with whatever the user types instead of using a fixed value.
Switch to Body (since parameters go in the request body), click the plus icon, and give parameter a name.
5. Insert Parameter into Request Body
Inside the body of the request, you need to add parameter:
You can take the example from the API provider and simply update it by adding your parameter names inside ${} wherever you need them.
Example:
{
  "model": "deepseek/deepseek-chat-v3.1:free",
  "messages": [
    {
      "role": "user",
      "content":"${textinput}"
    }
  ]
}
Click Json, insert your json.
6. You can check out how it works
Click Test, enter a value for the parameter, and run the test.
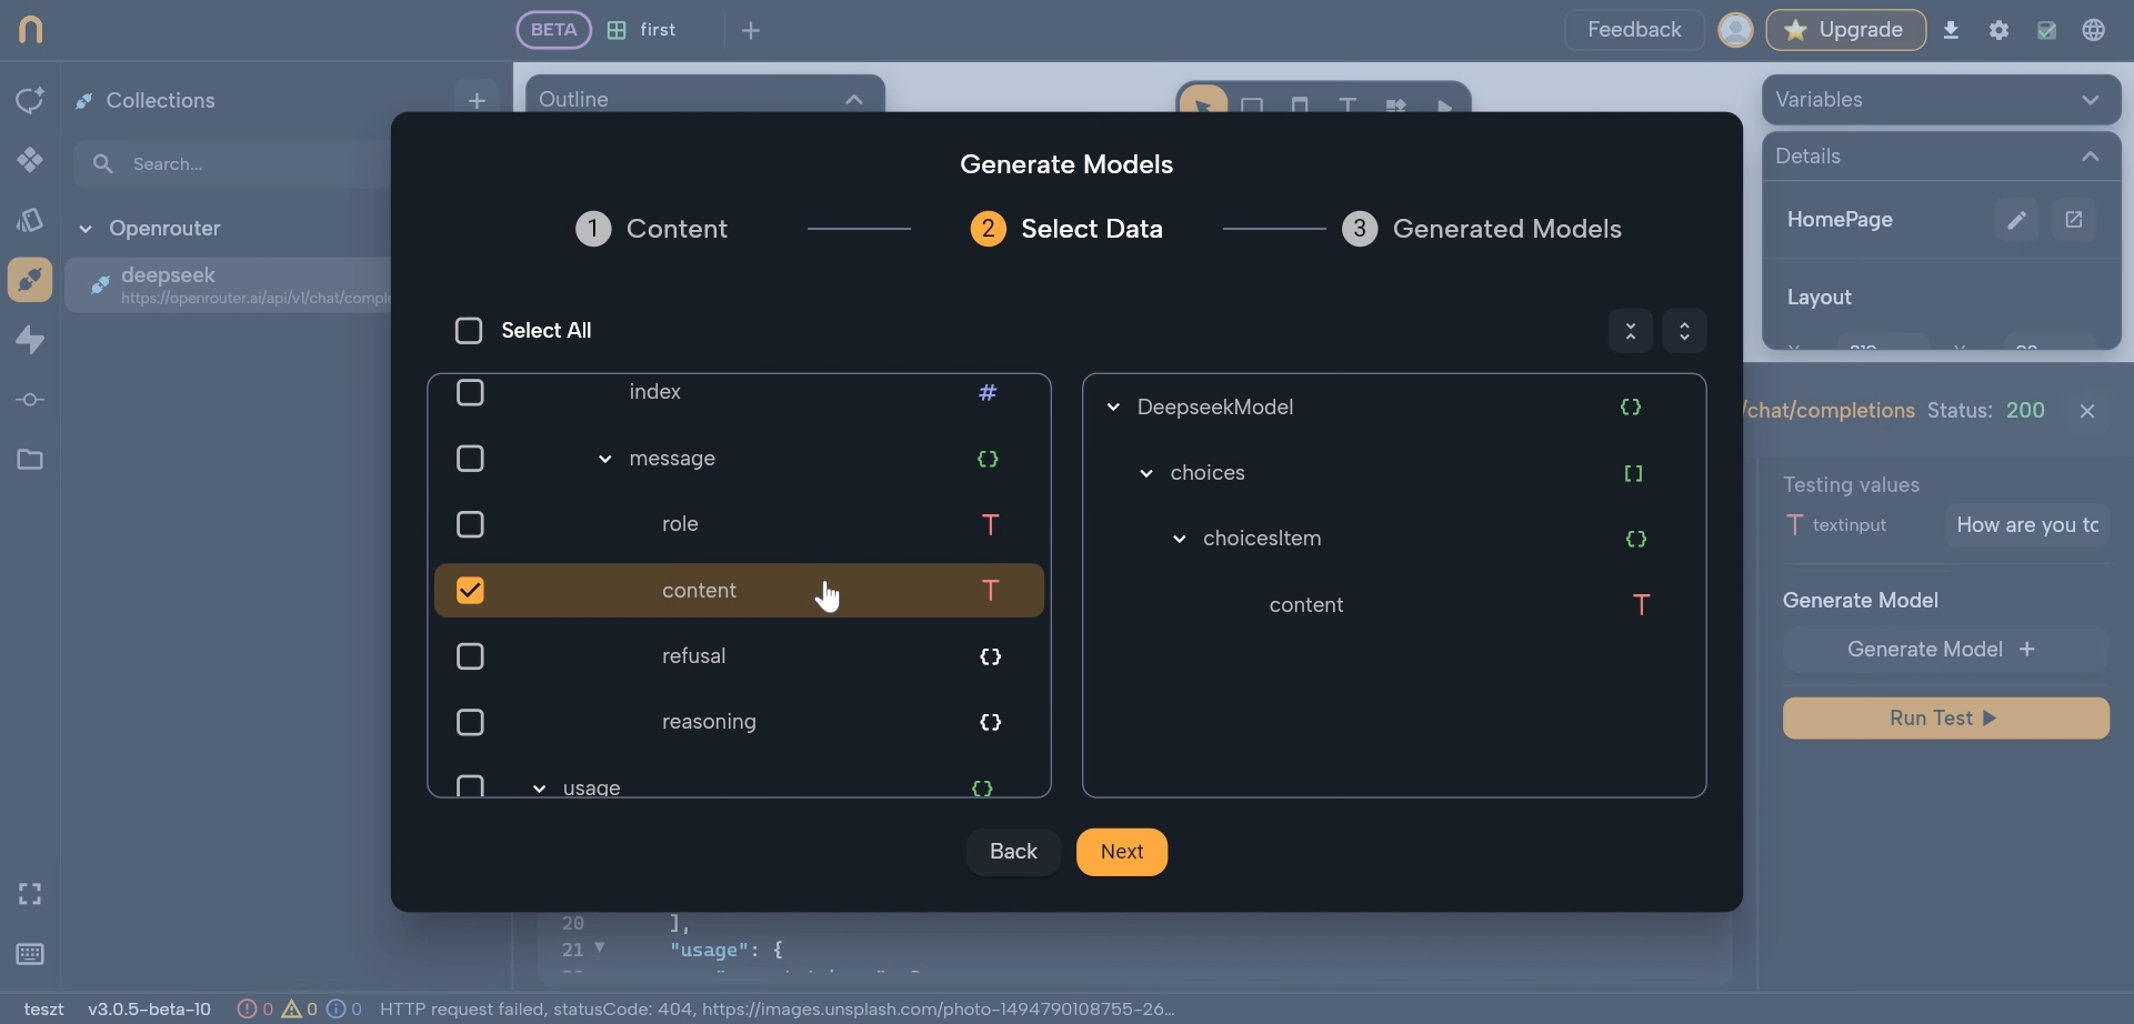
7. Build the Model
The response often contains a lot of data, but you only need the parts that matter, so here you can create a model that maps just the values you want to use in your app.
Steps:
- Click Generate Model
- Click Next
- Select what you need from the Response
- Click Next
- Click Save
8. Create UI Elements (TextField & Button)
You need two elements: a text field where you can type your request, and a button that sends it.
- Close the API request window
- Open Widgets
- Add TextField from list
- Open Widgets again
- Add Button
9. Connect Button to API Call
In this section, you will learn how to connect logic to the button.
How you can do it
- Click on the Edit button next to the text "On Pressed".
- Click the + icon.
- In the API section, search for your API (e.g.,
"deepseek"). - Add a value to the
TextInputvariable from the TextField: - Select the Text Controller
- Then select the Text property inside the controller
10. Show API Result in Alert Dialog
The API sends back data, and you can show it in your application, for example in an Alert Dialog.
You can use a custom expression, and that’s why it starts with value — because the generated return value defaults to value in the data model.
Since you know how the data model is built, you know exactly which part is required.
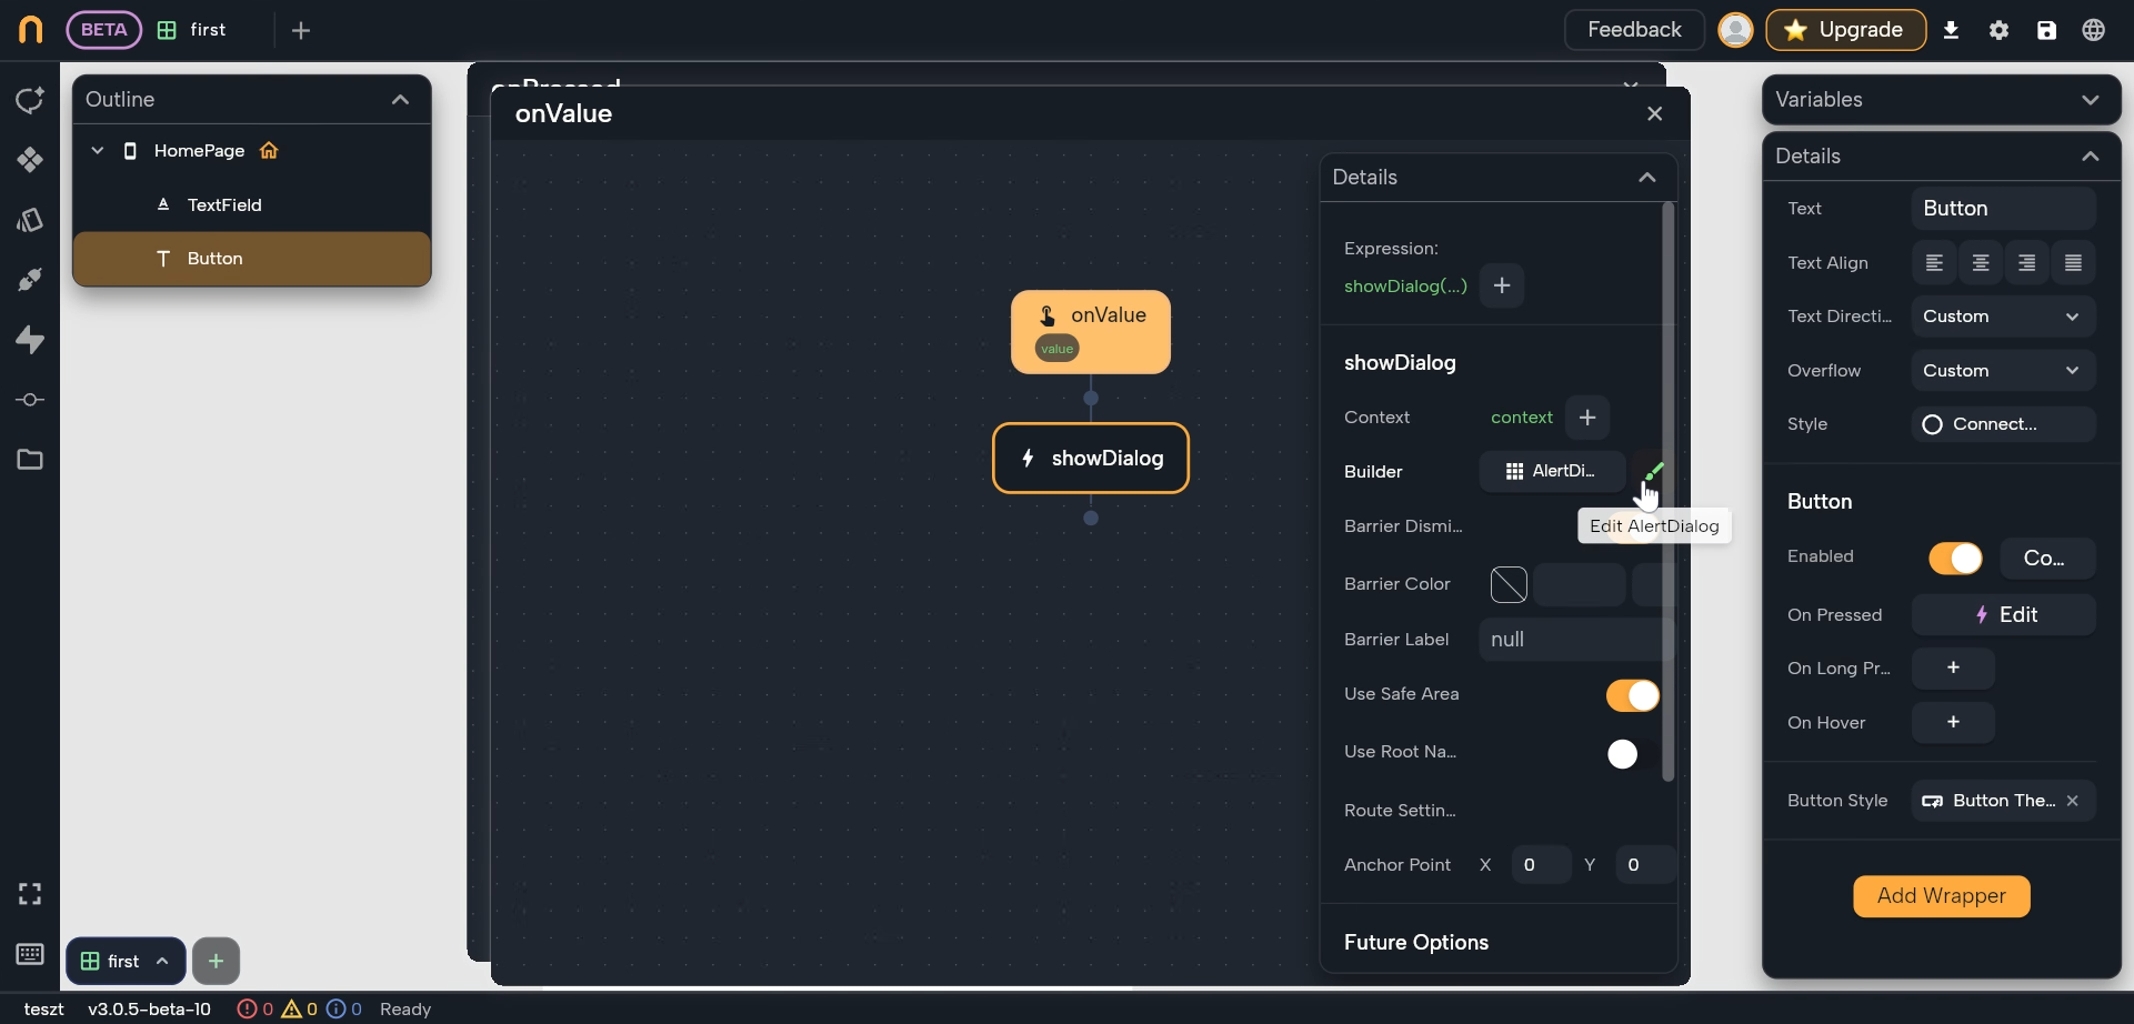
value.choices!.first?.content
How you can do it
- Click on the Edit button next to the text "On value".
- Click the + icon.
- In the API section, search for Showdialog.
- Click the edit Alertdialog.
- Click the 🖌️.
- Click the text.
- Click Custom Expression.
- Add your Custom expression.
- Click on Eval.
- Close opened windows.
11. Review the Final Result
Time for the full test:
You can click the Play button, write something you want in the Textfield, and then you can click the Button.
Eval means evaluate — it checks your expression, and if it’s correct, adds it for visual editing.